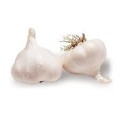
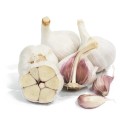
Garlic is very easy to grow – and since it grows through the winter, they require little additional water, where I live in northern California.
Botanical Information
Taxonomy
- Allium sativum
- Allium sativum ophioscorodon = hard neck garlic
- Allium sativum sativum = soft neck garlic
- Allium ampeloprasum = elephant ‘garlic’ (actually a leek), also called Gigantum
- part of the onion family: onions, leeks, shallots, chives (alliums)
| Kingdom | Plantae |
| Division | Magnoliophyta |
| Class | Liliopsida |
| Order | Asparagales |
| Family | Alliaceae |
| Subfamily | Allioideae |
| Tribe | Allieae |
| Genus | Allium |
| Species | A. sativum |
History
- Tacuinum Sanitatis, a medieval handbook on wellness based on an 11th century Arab text, references harvesting & using garlic for health
- Known as garlic from William Woodville, Medical Botany, 1793
Physical Description
Varieties & Cultivars
Garlic Subspecies
Garlic is divided into 2 subspecies, or varieties, plus Elephant Garlic. Elephant garlic is actually closer to a leek than a garlic, but because it looks, tastes, and is grown like garlic – it’s included.
-
Ophioscorodon Subspecies or hardneck varieties:
- AKA: Ophio garlic, top-setting garlic, Serpent garlic
- Types include Purple Stripes, Rocambole and Continental (Porcelain)
- Evolved directly from wild Allium longicuspis
- Produces woody flower stalk that rises 1 to 6 feet high (sometimes referred to as false seed stalk because no fertile seed or flower is produced)
- The flower stalk, or scape, starts succulent and coils then turns woody & straightens
- Produces a single circle of 4-14 cloves around the central woody stock, or neck, of the bulb
- Far more flavor than soft necks, popular in gourmet restaurants
- Relatively short storage time, compared to Sativum, or softneck, varieties
- example types:
-
Sativum Subspecies or softneck varieties:
- also known as:
- soft neck garlic
- Artichoke garlic
- Silverskin garlic
- Types include Artichoke and Silverskin
- Form large bulbs
- Vigorous growth, despite pale-green foliage
- Generally coarse-skinned, not always beautiful
- Highly productive in wide range of climates
- Capable of very large bulb size, when flower stalk is cut
- Store longer than ophios (hardnecks)
- Low bulbil production
- Produce more cloves per bulb than ophios:
- 3-5 clove layers
- 8-40 cloves per bulb
- Lack flavor compared to Ophios
- Tend to be very hot or very mild
- Cold winter climates produce hotter taste
- Less stable, genetically; more likely to display a wide range of environmental responses
- also known as:
- Elephant Garlic (Allium ampeloprasum – from the leek family, not actually a garlic)
- AKA: Oriental garlic, Ail d’orient
- Varieties include the Leek group, the Kurrat group, and the Great-headed garlic group
Colors Available
- outer wrappers can be white to brownish
- inner clove wrappers can be white to pink to purple with striping or marbling
Varieties
Growth Requirements
Climate & Temperature Requirements
Air Temperature
Hardneck garlic varieties, ophioscorodon family, do best with cold winter temperatures. According toMr. England, cold winter temps “ensure high vigor and quality”, but he does point out that there are some “Southern Continental” varieties that perform better in the southern US.
Soil Temperature
Humidity
Day Length or Light Requirements
Site Conditions Favored
Soil Requirements
Soil Texture
- Garlic prefers sandy loam soil, but any well-drained soil will do. The looser the dirt, the bigger the bulb will grow. Good drainage is key.
pH
6-7 pH
Nutrient Requirements
Garlic needs lots of phosphorous.
Planting Garlic
Propagating Garlic – Seed Garlic
Garlic is propagated by planting individual cloves of the garlic directly into the bed. The bigger the clove, the bigger the head it will produce. However, the size of the clove relative to the rest of the cloves in the same head makes no difference.TKG Diseases and nematodes can be introduced to your garden by the seedstock that you obtain, and aren’t always apparent on the clove, so make sure it is from a trusted source.
When to Plant
Most seedstock companies ship in autumn, but for people living in very cold climates, early spring is the better time to plant.
Crop Rotations
To avoid soil-borne pests and diseases, like white rot, plant garlic in beds that haven’t grown garlic, onions, leeks, or shallots (any of the alliums), for the last 3 years. Bulb & Stem Nematodes can persist in soil for long periods, so crop rotation isn’t very effective for this pest.
Bed Prep
- Line your garlic bed with hardware cloth or use gopher wire or traps, since they love garlic.
- Loose texture results in larger garlic heads
Soil Amendments
- Turn under fully matured aerobic compost with no cedar or redwood
- additional phosphorous may be warranted
Calculating Seed Stock Quantity
- 1 lb of seed garlic will plant about 25 row feet at 4″ spacing.
Sowing Garlic
- Crack the garlic bulb into separate cloves and select the healthiest and largest cloves for planting. The rest can be eaten, or used for garden sprays. The cloves, once cracked, should be planted within 5-7 days. (Note: if your soil is greater than 50°F, then you’ll need to pack the cloves in moist sand and refrigerate until they sprout; this could be anywhere from a few days to a few weeks)TKG
- Dip the cloves in kelp water (2 T liquid kelp : 1 gal water)
- Plant the clove, root-end down (see spacing recommendations below)
- Cover with 2″ (3-4″ in northern areas) of soil
- Mulch with leaves, compost or straw (up to 8″ in cold areas)
- In spring, once frost danger has passed, remove the mulch then water well
Plant & Bed Spacing
Standard Spacing:
- cloves 4″-6″ apart in rows 18″ apart
- 1 lb of seed garlic will plant about 25 row feet at 4″ spacing.
Biointensive Spacing:
- plant cloves in off-centered rows, cloves 4″ apart in all directions
Routine Cultivation & Maintenance
Water Requirements
Watering well in the spring is critical, when it’s coming out of winter dormancy. Remove the winter mulch and water well, but then don’t water again until the soil is dry. I had really small heads in the areas where I didn’t water enough. In my dry, warm climate, I would rather over-water than under-water garlic. Good drainage is key.
Fertilization Recommendations
In the spring add some composted manure or a balanced fertilizer before the bulbs start to swell.
Mulching & Weeding
Mulch when you first plant them in the fall, but remove the mulch in the spring after the last frost.
It’s good to keep the weeds down to prevent competition.
Pinching or Pruning & Dividing
If the garlic sends up a flower stalk in the spring, snip it off as close as possible to where the leaves join after it curls, but before the flower head starts to point back up. These are garlic scapes and are part of your harvest. See Harvest Section to find how to use scapes. Cutting off the flower scape allows the plant to focus on growing a larger head of garlic. I’m not sure if the flower results in viable seed…
Winterizing
Mulch up to 8″ in colder areas to get through the winter; remove mulch in spring, after last frost.
Companion Planting
Helpful Companions
Harmful Companions
Companion to..
Pests, Diseases & Problems
Common Pests
Common Diseases
Symptoms
Whole Plant
Leaves
- Chlorosis, or yellowing, of the leaves
- general yellowing (chlorosis) of the youngest leaves, followed by the rest of the plant, and gradually a purpling of the veins starting at the tips of middle-aged leaves = Boron deficiency
- older leaves have yellow leaf tips at first, then new leaves progressively smaller, may show general yellowing of the leaves, young leaves fold and grow in a loop = Nitrogen deficiency
- oldest leaves get deep yellow leaf tips, new leaves are small and weak with fewer than normal leaves = potassium deficiency
- general chlorosis of the oldest leaves, starting at the base of the leaf; plant continues to form new leaves, which are normal green, so there’s a sharp contrast between older leaves & new leaves; often there are only 3-5 green leaves at any time, with the lower leaves yellow or dead = Magnesium deficiency
- Necrotic Spots on leaves, gradually increasing in size; leaf blade bends down and tips die; gradual dieback of entire leaf; about half as many total leaves as a normal plant = Calcium deficiency
Flowers
Bulb
- mature cloves of the bulb wet & soft – when cut in cross-section, the cloves may have white, corky patches of deteriorated flesh = Boron deficiency
- bulb doesn’t form cloves, remains one round head = Calcium deficiency
Harvesting & Storage
Edible Parts of the Plant
- Scape (flower stalk): mild garlic or chive taste, but rather sweet; the texture after stir-frying or roasting is very similar to grean beans.
- Green Garlic: (aka spring garlic or young garlic or garlic scallions) unripe garlic bulb, pulled anytime before cloves form; taste is much more mild and looks more like a scallion or leek than a head of garlic
- Ripe Garlic Head (garlic head comprised of cloves)
Yield
- 1 lb of seed garlic will yield up to 10 lbs of harvested garlic
- 1 clove planted = 1 head harvested
- number of cloves per head varies by variety
Days to Harvest / Harvest Timing
Scapes
- some garlic varieties will send up a flower stalk in the spring
- harvest garlic scapes after the flower stalk curls, but before it is pointing straight back up again
- the scape can get a little woody if it’s left on too long; it starts out succulent and coils then turns woody & straightens
- cut it from the plant as close as possible to where the leaves join
Garlic Heads:
- Immature garlic (harvested too early), also known as green garlic, lacks some character and flavor, but it is hardly noticeable when tasted by average consumers
- hot weather can speed up the maturity rate for garlic
- when the leaves begin to turn yellow in the summer, usually after it heats up a bit, stop watering and in 2 weeks you can harvest the whole plant
- garlic takes 5-8 months to mature into cloves (TKG)
Cues to Harvest
- Harvesting too late can make the clove wrappers degrade – crack or get holes, and disintegrate – so they don’t store as long. They also may get kind of grey and ugly looking
- You will know a garlic head is overmature if it’s really smelly
- If you are harvesting for seed stock, you can allow the bulb to be left in the ground until it dies back. They won’t store well, so make sure to plant before the freeze. The bulbs are easier to crack when they are overripe like this.
- many gardeners use the leaves as an indicator; others use bulb color, but that requires digging them up to check, so I have concentrated on the leaves. Each brown or dead leaf represents bulb wrappers that are decayed; the number of green leaves present indicates how many solid wrappers are on the bulb.
Hardneck Varieties (AKA Ophioscorodon, Top-setting Garlic)
- if you choose to snip the scapes off, leave a few on to use as indicators. Harvest the bulb after the scape goes back to upright, but before the scape spathe (flower) has opened. Dig up a sample to see if you can see the individual cloves through the outer skin. If so, then they are ready!
- another indicator is the number of green leaves left on the plant: harvest when 6 green leaves remain
- hardnecks are ready 2-3 weeks after softnecks
Softneck Varieties (AKA Sativum, Artichoke Garlic, Silverskin)
- harvest timing is less critical than for the other varieties
- Harvest a little early if you want to braid them, so the greens are more pliable (softnecks only)
- softnecks are ready before hardnecks: one source claimed a few days to 1 week, another said 2-3 weeks earlier than hardnecks
- When a third of the leaves are brown or drying (from the bottom up) dig up a bulb or two to check. You should be able to see the individual cloves through the outer skin.
- another source went by the number of green leaves, as opposed to brown or dying: harvest when they still have at least five green leaves
Harvest Methods
Scapes
- cut scapes from the plant as close as possible to where the leaves join
Garlic Heads:
- Turn off watering for two weeks, then after the soil has dried out, the whole plant should be easy to fork out of the soil;
- If the soil hasn’t dried out, loosen the soil around the bulb, then cut under the bulb to sever the anchoring roots. This reduces potential damage the bulb.
- Handle the bulbs gently, since cuts and bruises decrease storage time and allow the garlic compounds to vaporize off
- Use a pitch fork or shovel to loosen the soil under the bulb, then it can be easily pulled out
- Direct sunlight should be avoided; sunburned garlic turns translucent yellow and spoils quickly
Storage of harvest
Curing Garlic
- Curing garlic allows it to be stored – cured garlic is what you find at the store
- To cure your homegrown garlic:
- After pulling from the soil, lightly dust the dirt off the bulb and roots
- To cut or not to cut:
- Some people believe that leaving the tops and roots uncut for the drying process ensures a longer storage time. I haven’t experimented with it, but I find it easier to leave them intact – although it takes more room… There are studies that show the incidence of disease in stored garlic is reduced nearly 65% by waiting to cut the necks off until after they have cured. Also, if you leave the greens on, you can braid them in bunches of 12 or so, then hang them up. You can also just use the greens to tie them up to a rack or hooks.
- If you choose to cut them off, cut the roots 1 cm below the bulb; cut the greens off 3 cm above the bulb.
- Lay them out on a rack or screen, leaving room between each to allow good air movement. It’s best done in a shady, warm, dry spot.
- It takes 2-3 weeks at about 85 degrees F.
- Cure until the wrappers are papery but the stalks are still flexible, a week or twoTKG
- Trim the tops & roots to the same dimensions when done curing, if you left them on
- Lay the plants in the shade on racks to allow air movement, so they can dry out and cure
- They can also be tied (or braided for softneck varieties) and hung to dry
- Garlic gets stronger tasting the longer it cures, but there’s a fine line between curing the garlic and starting the clock on its shelf-life. Cure for at most 30 days.
- Elephant Garlic needs to cure for at least 30 days before eating it; uncured, or green, elephant garlic is bitter
Fresh or Green Garlic
- Doesn’t store for long, so eat it when harvested; refrigerate covered in plastic until use.
- wrap in damp paper towel in a plastic bag; will keep 5-7 days (food52.com)
- store like fresh herbs: put it in a glass or vase with some water in the bottom (food52.com)
Cured Garlic
- Depending on the variety, you can keep garlic on hand for up to a year, unless it’s overripe
- Overripe Garlic Storage times:
- Hardneck: 2 months
- Softneck: 3-4 months
- Overripe Garlic Storage times:
- Hardneck varieties, though, will keep for only 6 months, at the most
- swollen root nodules indicate storage time is short – they don’t indicate quality or taste, just that they are getting ready to sprout (keeping humidity low will prevent this)
- garlic heads can be stored in mesh bags or on racks
- optimum storage conditions (pulled from different sources)
- 50°F at less than 60% humidity
- 55-65°F, 40-60% humidity
- if humidity is too low (<40%), the cloves will start shrinking – especially the hardnecks
- refrigerators are too humid for garlic – they will sprout or mold
- the flavor of garlic increases in the short term, but starts decreasing eventually
- individual cloves do not store well; use up quickly
- Sprouted Garlic:
- garlic that starts to sprout while in storage used to be thought of as bitter, but I’ve not noticed any bitterness (and we ate a lot this year)
- there are some sources claiming that there are many health benefits from sprouted garlic, so maybe its now a good thing 🙂
- some chefs even recommend not using the green endosperm (center) of the clove, even if it hasn’t sprouted yet, due to bitterness…
Roasted Garlic
- Refrigerate roasted garlic for up to 2 days in a small bowl
- Roasted garlic can be frozen for about 6 months
- see recipes for roasted garlic
- Garlic confit, similar to roasted garlic, is another way to cook it before freezing
Canned
Frozen
- Can be frozen as-is (unpeeled); just break off cloves as needed
- Grind or chop, then wrap tightly and freeze. To use, just break some off or grate it.
- Pureed with olive oil (1 part garlic:2 parts oil), garlic can keep for up to 6 months, and because the oil doesn’t freeze solid, you can scoop some out without defrosting.
- Submerge peeled cloves in olive oil. Must be kept in freezer. Botulism can result if not kept cold enough
- Minced garlic and mixed into butter, can be frozen up to 9 months (refrigerate for up to 1 week)
Pickled
- Pickled garlic can be kept in the refrigerator for up to 3 weeks
- Canned via the boiling water method for 10 minutes, pickled garlic can keep for up to 1 year
- peeled cloves can be kept submerged in wine in the fridge until it shows mold growth or yeast on the surface of the wine. Just remove cloves as needed. The wine gets infused and can also be used in cooking. Do not allow to sit at room temperature.
Dried
- Garlic can be dried minced or sliced.
- One source stated garlic should be dried at 140°F for 2 hours, then lower temp to 130°F until dry and crisp
- Another source stated 115°F for 48 hours is better, since higher temps can lead to chewiness
- Blend or pulverize dried garlic to make powder
Seed Saving
Similar to potatoes, it isn’t recommended to save your own garlic for seed stock; however, if you know your garlic doesn’t have white rot or stem & bulb nematode, it’s probably okay to save for your own seed stock.
Cooking with Garlic
Click here for Garlic Cookbooks available from Amazon
Preparation:
Normally, garlic heads are divided into separate cloves then skinned before mincing, chopping, slivering, or slicing for your recipe. However you can also roast garlic heads in their complete form. See below for how to roast garlic heads.
There are two main methods for skinning a garlic clove: Smashing the clove with the side of your knife & the heel of your hand, or by slicing the pointy tip and the root end of the clove off. The smashing method is quickest, but you tend to lose more of the healthy and yummy juice (and antioxidants). It also isn’t the best if you want to have nice slices or slivers for your recipe. It’s the quickest method because the clove just falls out of the skin after you thump it. The other method works well if you have hard-skinned garlic, but if you have types with paper-thin skin it can get frustrating to get all of the skin off.
Green Garlic:
- trim off bottom of the bulb (by the way, basal plate is not edible, but roots are)
- all of the white and light green parts are used; dark green leaves can be used in stock or like bay leaves in soups and sauces; also, similar to leek greens, they can be dried and ground for seasoning
Garlic Scapes:
- scapes are fibrous on the outside, so when preparing, make sure to cut straight across, not at a diagonal; cut on a diagonal, the fibers become very sharp
- garlic scapes can be sauteed, roasted, or stewed
- puree cooked garlic scapes for adding to beans, rice, pasta, omelets, or even make into a pesto
Minced Garlic:
Once you’ve skinned the clove (and blanched, if necessary), to mince garlic you can either use a garlic press (but you lose some of the meat) or mince by hand, by slicing thin slices in every direction, then by going back over again to get the size you need for your recipe.
Chopped Garlic, Sliced Garlic & slivered garlic:
These cutting methods are all pretty self-explanatory.
Cooking Methods
Blanching Garlic
Blanching takes the bitterness, spicyness and acidity out of garlic, and makes it sweeter. It probably also sucks some of the healthy juices out of the clove, but for some recipes it’s really helpful. To blanch, bring a pot of water to a boil and boil skinned cloves for about 2 minutes. Take cloves out and put them into an ice bath to stop the cooking right away. Some recipes call for a particular blanching process, like 3 repetitions of the boil-remove process, so follow whatever the recipe calls for in that case.
Sauteed Garlic
Warm vegetable oil (olive, canola, safflower, etc) in sautee pan on medium to medium-low. I use a lower heat than i would normally use for sauteeing, to keep them from getting bitter-tasting. When oil is warm, add garlic (sliced or minced or slivered) and stir continuously, until garlic is browned slightly. Use the oil along with the garlic in your recipe. You can just add spinach or other cooking greens to the pan at this point, and turn off the heat to wilt them slightly. Or you can pour the oil & garlic onto green beans, or other vegetables that are good raw or barely cooked.
You can make anything taste good with sauteed garlic on it. 🙂 Even escargot!
Roasted Garlic
For roasting a full head of garlic, brush off loose outer skin and dirt from the head; slice off the top of the head, cutting through most of the clove tips. Set the head in a piece of foil or a garlic roasting dish. Drizzle olive oil over the open cloves, then add a pinch of salt. Snug up the foil, or put the lid on the roaster, and put in oven (or grill). I’m usually roasting this along with the main meal, so I put it in at whatever temperature i’m cooking with, but 350 degrees should be enough. It takes about 30-45 minutes, depending on the heat and size of the garlic head. Just keep squishing it to see how soft it is. When done, it will be really squishy and browned slightly. To use, let the head cool slightly, then you can either use a butter knife to pluck out the individual cloves, or squeeze individual cloves with your fingers. The clove will spread nicely on bread or toast…or anything, really.
To roast individual cloves, place them in an oven-safe pan and drizzle with olive oil & sprinkle with salt. cover tightly with foil and bake for 30 mins at 400 degrees. It can also be done in a pan on the stove, but keep the heat from getting too hot.
Click Here for Garlic Recipes
Sources
- Alternative Nematode Control by National Sustainable Agriculture Information Service
- Garlic Factsheet
- Garlic: Organic Production by National Sustainable Agriculture Information Service
- Growing Great Garlic
- Organic Gardener’s Handbook of Natural Insect and Disease Control
- Pests of the Garden and Small Farm
- TKG: The Kitchen Garden
- Put ’em Up!
- Rodale’s Vegetable Garden Problem Solver
- Williams-Sonoma The Art of Preserving
- Food52 – Green Garlic: the Adolescent Allium
- Fine Cooking In Season


