Onions are a fantastic addition to the veggie garden because they can fit in to lots of spots, help distract pests, and can be harvested and eaten at any time! It can be a challenge to get onions to get to be big bulbs – water and daylight hours are the key.
Table of Contents
- 1 Botanical Information
- 2 Varieties & Cultivars
- 3 Growth Requirements
- 4 Propagation
- 5 Planting Out
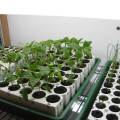
- 6 Container Gardening
- 7 Routine Cultivation & Maintenance
- 8 Companion Planting
- 9 Pests, Diseases & Problems
- 10 Harvesting & Storage
- 11 Cooking
- 12 Resources
Botanical Information
Taxonomy
Alliaceae, the onion family, includes Chives, Garlic, Leeks, Shallots, as well as Welsh onions and Tree onions:
- Onions: Allium cepa
- Welsh onions: Allium fistulosum
- Tree onions: Allium cepa Proliferum Group
- Shallots: Allium cepa Aggregatum Group
- Garlic: Allium sativum
- Leeks: Allium porrum
History
Physical Description
- Plants in the onion flamily have a pungent flavor and many produce typical drumstick flowerheads if left to flower. Crops include pickling onions, slim young spring onions, and red, white, and yellow globe onions. All are hardy, cool-climate crops. Fairly simple to grow. (RIEOG-306)
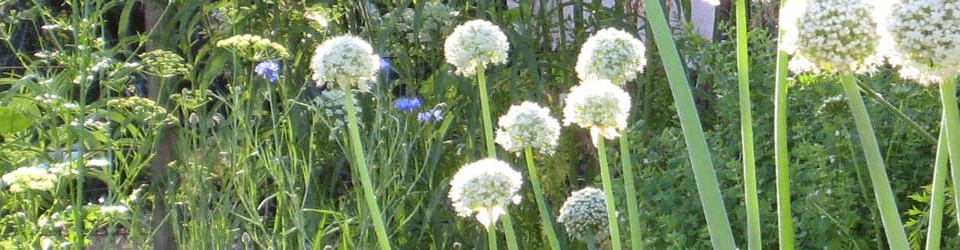
- Onions left to go to flower produce ball-shaped flower heads at the top of their tall stems that are striking, colorful, and attractive to bees. (RIEOG-329)
- A popular, long-season, frost-tolerant crop. Simple to grow from sets, and undemanding if you want to grow kitchen-size bulbs. In mild areas with low summer rainfall, autumn-planted onions may be more reliable.(RIEOG-355)
Varieties & Cultivars
Categories or Types of Onions
Onion varieties differ based on day length requirements and the temperatures required for bulb formation (see below for info on day-length requirements)
Bermuda Type Onions
- Bermuda type onions are especially susceptible to Neck Rot Disease (BBGS-131)
Bunching Onions or Spring Onions
- spring onions are a quick filler crop, eaten as slim young plants, leaves and all (RIEOG-306)
- onions that are harvested after only 8 weeks or so;
- European spring or bunching onions form a slim plant with a white or red shank,
- mild-flavored for salads
- available in red or white cultivars
- hardy cultivars are grown over winter
- suitable for containers and growing under cover
- these are the tastiest, earliest scallions you can imagine. These onions will not form a bulb; the bottoms stay thin all year long, so plant them where you won’t be tilling, such as next to a perennial planting. You can harvest some all year long, then let them go to seed and they will sow themselves in the same rows. Beautiful flowers, which the bees love. These new spring onions will be the very first thing you will be able to harvest from your garden in the spring, and they will also be at their tastiest (BBGS-130)
- Recommended varieties of bunching onions:
Egyptian Onions
see Tree Onions
Japanese Varieties
- hardy Japanese varieties can be planted in the fall to overwinter for early to midsummer harvests (GV-141)
Pickling Onions or Mini Onions
- pickling or mini onions have small bulbs that can be used fresh or for pickling
- harvested after only 8 weeks or so
- available in red or white cultivars
- Recommended pickling/mini onions:
Spanish Varieties
- Spanish variety onions are more resistant to thrips than others (BBGS-108)
Sweet Onions
- onion flavor is dependent upon water, sugar, and sulfur content:
- Water
- higher water content results in sweeter onion
- extra water dilutes the sulfur content in the onion
- Walla Walla onions have about 85% water
- Sugar
- sweet onions have about 6-15% sugar content, whereas long day onions have 3-5% sugar
- Sulfur
- Sulfur results in the opposite of sweet – the typical strong onion flavor. Pungent, strong, biting, or hot flavor is from the sulfur
- higher sulfur content results in a longer-keeping onion
- if sweet onions are desired, do not add any sulfur; watch out for fertilizers that use the sulfur forms of nitrogen, phosphorous, or potassium
- Water
Tree Onions
- the top of the stem produces clusters of small bulblets instead of flowers (GV-145)
- they can get up to 4′ tall, eventually getting bowed down under the weight of the bulbs, which can then make contact with the soil and produce new plants for the following year (GV-145)
- these onions make good pickling onions, or cooked (GV-145)
- the perennial Egyptian or tree onion bears aerial bulbs in place of flowers, and these may sprout and grow in the soil (RIEOG-306)
Welsh Onions
- like giant green onions, but taller – up to 18″ tall
- they grow in clumps (like chives) with green, hollow stems; they thicken at the base but don’t form large bulbs
- the stems are eaten: raw or cooked
- planted in spring, harvested in fall; planted in late summer can be cut the following spring
- perennial, so they will continue to produce every year and you can harvest all year long
- the base of the leaf is thickened at and below ground level
- a useful winter vegetable, surviving temperatures as low as 14°F
Shapes Available
- oval
- round
- torpedo or cylindrical
- squat round
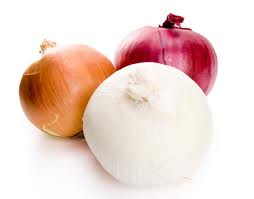
Colors Available
- purples
- red
- red cultivars are especially prone to bolting (RIEOG-356)
- pinks
- pure white
- various shades of yellow
Varieties – information on different varieties I’ve grown
Growth Requirements
Climate & Temperature Requirements
Light Requirements
- plant in full sun
- green onions tolerate some shade, but to mature, they will need full sun (BBGS-245)
- open & sunny site is preferred, but they will tolerate some shade (RIEOG-355)
- Autumn-sown or planted onions need full sun and must have good drainage (RIEOG-355)
Air Temperature
- onions are adapted to a wide range of temperatures and are frost tolerant
- can handle temperatures as cold as 20 deg F
- seedlings should be kept under cover and heated to at least 50-61°F to get them off to a good start (GV-142)
- before bulbing starts:
- optimal production when temps are 55-75 deg F for an extended period of time, which allows the plant to get lots of green foliage and a good root system before going into bulb production
- after bulbing starts:
- high temps and low humidity during harvest and curing are good
- if it gets too warm too early, a lot of onion varieties will send up a flower stalk, or bolt
- some recommend to harvest and eat the onion ASAP if this happens, but I think just cutting the flower stalk as close to the bulb as possible lets it continue to grow
- Onions don’t mind the cold (BBGS)
Soil Temperature
- germination:
- ideal soil temps: 45-70°F (RIEOG-108)
- spring onions and pickling onions: minimum germination soil temperature is 41°F (RIEOG-355)
- germination can be inhibited if temperature is too high (RIEOG-108)
- germination temp is 70°F (heat mats help germination) (source???)
Humidity
Day Length Requirements
Day-Neutral Onions
- day-neutral cultivars will form bulbs in both areas (RIEOG-355)
- Recommended day-neutral onions:
Short Day Onions
- Need 10-12 hours of daylight to bulb
- need only 12 hours of daylight, so they thrive in southern climates (RIEOG-355)
- Best grown in the southern US, where they grow through cool fall and winter months, then are triggered to bulb by the 10-12 hours of sunlight that come in early summer
- Usually the sweeter varieties are short day onions, although Walla Walla Sweet onions have been adjusted to grow well in long day regions; sweetness of onions is dependent upon water and sugar content, and short day onions have more water and higher sugar content
- the high sugar and water content of short day onions means that they are not long keepers. They will only store for a couple of months
- if short day onions are grown in the north, they will start to try to form bulbs too early and never form good-sized bulbs
- short day onions form great pearl onions in the north
- Recommended short day onions:
Intermediate Day Onions
- Need 12-14 hours of daylight to bulb
- Will grow well in just about every region of the US, except south Texas and south Florida
Long Day Onions
- Need 14-16 hours of daylight to bulb
- long day onions need 13-16 hours of summer daylight found in more northern latitudes (RIEOG-355)
- Best grown in the northern US, where the days are longer in the summer
- foliage grows during the cool spring, then start forming bulbs when temperatures warm up and the days are longer
- Usually have the lowest sugar content (3-5% sugar) resulting in long-keeping onions, but not sweet
- if grown in the south, long day onions will grow lots of lush foliage, but not bulb out
- Recommended cultivars of long day onions:
Site Conditions Favored
- do not grow where onions, garlic, leeks, shallots, or other alliums were grown in the last two years to reduce potential for fungal disease (smut, downy mildew, pink root)
- the longer it’s been that the bed has been used for alliums, the better
Soil Requirements
Soil Texture
- loose, crumbly, well-drained, lots of organic matter
- the looser the soil texture is, the larger an onion will grow
- lots of organic matter is good for loose soil texture
- Autumn-sown or planted onions must have good drainage (RIEOG-355)
- onions prefer friable, well-worked soil, with compost and/or manure worked in the fall before spring planting
- loose and well-drained soil; onions grow bigger in very loose soil (PVFS)
- well-drained and not too wet (GV-141)
pH
- 6.0-7.0 (All the Onions, RIEOG-355)
- slightly acidic (Peaceful Valley)
- 6.0-6.5 (Kitchen Gardener Magazine)
- 6.0 (BBGS-129)
- onions don’t like acidic soils, so add some lime if the pH level is lower than about 6.5 (GV-141)
- Welsh onions and Bunching onions: 6.0-7.5 (RIEOG-356)
Nutrient Requirements
- heavy feeder (source?)
- onions need highly fertile soil (PVFS)
- lots of organic matter is good for fertility
- animal or vegetable compost matter is good, but must be fully broken down (PVFS)
- cedar or redwood compost is not acceptable (PVFS)
- low fertility soil results in more pungent flavor
- sulfur increases pungency of onions, so if you want sweet onions, don’t add any sulfur to your soil
- if sweet onions are desired, do not add any sulfur; watch out for fertilizers that use the sulfur forms of nitrogen, phosphorous, or potassium
- onions are light feeders, so they are great to use in your third year of a three-year crop rotation, along with beets, carrots, turnips, kohlrabi, and parsnips (BBGS-121)
- onions like a relatively fertile soil, but avoid rich feeding, which encourages disease and cuts down on storage life; soil that has been fed for a previous crop, such as potatoes or brassicas, should suffice (RIEOG-306)
Propagation
Methods of propagation
Some believe onions are best when grown from transplants, but others say they perform better when grown from seed. I think the contradiction comes from starting seeds directly outside, versus indoors – growing your own transplants, in effect.
Seed
- growing onions from seeds allows for the most variety to grow
- some experts think onions from seed are less prone to disease, store better & bulb quicker
- allow 1/2 oz seed for every 100′ of row to be sown
To grow your own transplants from seed:
Timing:
- When to start seeds:
- As a general guideline, start onion seeds 8 to 12 weeks before the set out date (4-6 weeks before last frost) VG
- start onion seeds 2 months before last frost, for spring planting of transplants (back date about 3.5 – 4.5 months for fall planting = June or July for mid-October planting)
- In order to give the onions a long period of growth, seed should be planted in late August in areas where winters are not too severe; in colder areas, seeds should be started indoors – however, if your season is long enough to give you 100-120 days for the onions to grow and mature (the actual time will depend on the variety), you can sow seeds outside a month before the final spring frost (BBGS-129)
- Sow seeds in spring for late summer and early fall harvests (GV-141)
- For the largest onions, sow seeds in midwinter (GV-142)
- sow indoors, with heat, from February through March, then plant outside in mid-April (RIEOG-300)
- for a late-summer harvest, sow seeds in February or March (RIEOG-355)
- for an early summer harvest, timing of sowing to suit geographical location is critical to ensure that seedlings will survive the winter but not bolt in early spring:
- sow in August, the 2nd week in the north, the 4th week in the south (RIEOG-355)
- bunching onions should be planted outdoors in early spring (BBGS-130)
- spring onions should get sown outdoors in spring and summer every 3 weeks for a continuous supply (RIEOG-356)
- for an early spring crop, sow suitable cultivars outdoors in August (RIEOG-356)
- Pickling and mini onions should be sown outdoors in March and April (RIEOG-356)
- How long should germination take?
- sprouts should come up in 7 days
- When are they ready to go in the ground?
- onion transplants should be ready to plant out 8-10 weeks from sowing (BBGS-48)
- onion seeds sown in late winter or early spring should be done under cover but no heat needed; plant them out when the ground is warm enough (GV-142)
- early-sown seeds will need to be transplanted into small pots (up-potted) before hardening off and planting out in mid-spring; later-sown seeds can be transplanted directly into the ground (GV-142)
- As a general guideline, onion seedlings are ready to be set out 4-6 weeks before last frost VG
- How long does the whole process take?
- starting from seed takes 100-120 days for mature bulbs to develop, but the widest variety is available this way
Methods:
- In Flats:
- sow the seeds 1/4″ deep in flats filled with a soil-less potting mix
- cover with plastic to keep the surface moist
- germination temp is 70°F (heat mats help germination)
- as soon as they sprout, remove the plastic cover and give them some light and move them to a cooler area
- thin the flat to 1/4″ spacing
- keep the seedlings under cover and heated to at least 50-61°F; this gets them off to an early start and gives them the longest possible growing period (GV-142)
- light:
- one warm white & one cool white bulb per fixture
- hang light right above the leaves, raising them as the onions grow
- watering & feeding:
- water enough to keep them moist, but not too wet
- half-strength water-soluble fertilizer used every other watering
- Multi-sowing Onions:
- multi-sown onions are grown in clusters (GV-142)
- sow them in module trays, 5 seeds to each cell (GV-142)
- transplant the groups of seedlings intact, letting them grow without thinning them out (GV-142)
- sow 6 seeds per cell and do not thin (RIEOG-355)
- Outdoors:
- sow seeds at a rate of 2 per inch in a row (BBGS-129)
- cover with 1/4″ to 1″ of soil, with the greater depth for soil that may dry out quickly (BBGS-129)
- sow thinly in rows; thin to 1″ in autumn, and in stages to the final spacing in spring (RIEOG-355)
- Bunching onions should be planted thickly in early spring; thin them a little with a rake when they come up, then just let them grow (BBGS-130)
- in mid- or late-spring, when the soil is warmer and drier, plant seeds directly into the ground; sow them thinly at 3/4″ deep in rows 12″ apart; thin them out once they are established; there is no point in sowing outdoors too early: if the soil is cold, the seeds won’t germinate (GV-142)
- for a late-summer harvest, station-sow several seeds per station, as soon as soil is warm enough (usually by Aril); thin to 1 seedling, or leave several to grow if multi-sowing (RIEOG-355)
- Gel Sowing:
- gel sowing has been shown to give higher yields of slow-germinating crops like onions (RIEOG-110)
- seedling emergence is often 2-3 weeks earlier than with dry-sown seeds (RIEOG-110)
Transplanting Seedlings (Up-Potting)
- when seedlings are about 5-6″ tall, transplant individual seedlings into 6-packs. Here’s how one author does it:
- overturn the flat to expose the seedlings’ roots
- carefully separate individual plants and their roots
- plant in its own cell, careful to not damage or fold the roots
- clip the tops back to 4″ so they aren’t wilty
- keep 6-packs under the lights, and continue watering with half-strength fertilizer every other watering
- onions are cold hardy, so they can go outside under protection, if your temps are above 20°F at this point
- when your onion seedlings are about the half-pencil, or fully the size of a pencil, they can be considered “transplants” and follow the directions for Transplants, below
- when seedlings are 4″ tall, harden off and plant out (RIEOG-355)
Seed Saving
- onions are some of the most successful vegetables to save seeds from, with a high success rate on germination (GV-69)
- to collect onion seeds, leave a few healthy plants in the ground in winter and let them produce flower heads the following spring; when they turn to seed heads, cut them down and dry them (GV-69)
- onion seeds are considered moderately easy to save (RIEOG-123)
- onion seeds last 1-3 years (RIEOG-123)
- store seeds in breathable envelopes or packets in a cool, dry room (RIEOG-123)
- seeds don’t last as long in humid climates (RIEOG-123)
Propagating from Transplants
- Transplants are also called Barefoot Onions
- can be planted out in the spring or fall
- but produce bigger onions when planted in the fall
- produce bigger onions than sets
- transplants can last two weeks, once pulled out of the ground, before being planted (PVFS)
- if you can’t plant them right away, either soak the roots then refrigerate or heel them in by mounding soil around the roots and keeping them moist (PVFS) (note: here’s an article I wrote on transplants that I thought had been heeled in for too long)
- onion transplants should be ready to plant out 8-10 weeks from sowing (BBGS-48)
- to plant out barefoot sets, trim tops to about 3″ and roots to 1/4″, then plant 1-2″ deep (cover only the white part of the bulb) 4-6″ apart, or only 3″ apart if you want smaller onions, or are going to think by harvesting green onions as the season goes by. They can also be interplanted with other vegetable crops, but they won’t tolerate heavy competition (PVFS)
Sets
- onions are easy to grow from sets
- sets are little onion bulbs that have gone dormant
- Sets are best if planted in the spring; fall planted sets tend to bolt when the days lengthen and warm in the spring
- sets may not produce onions as big as fall-grown transplants
- although they don’t produce as big of an onion, they are a good way to have a continual supply of scallions or small bulbs
- By planting sets (little bulbs started from seed the previous season), you cut down on the time to harvest, but you get a little less variety (BBGS-129)
- Sets are ideal for novice gardeners, as they are a great deal easier to grow than seeds, although they are more expensive to purchase (GV-141)
- Onion sets can be planted outdoors as much as a month before the last frost date (BBGS-130)
- Press sets into the soil so they are not more than 1″ below the surface, and 4-6″ apart. You will need about 4 lbs of sets for 100 row feet (BBGS-130)
- To plant onion sets, rake soil to loosen it up, then mark out a shallow drill about 1″ deep, the length of your row. Push the sets carefully into the soil with pointed ends upward, spacing them 2″ apart for small or medium bulbs, or 4″ apart for larger ones. Draw the soil back around each set so the tip is only just visible. Gently firm down the soil, water sparingly if the ground is dry, but don’t soak them (GV-142)
- Onion sets are less prone to attack by Onion Fly maggots than plants grown from seed (GV-143)
- For a late summer harvest, plant sets in March and/or April. They need a period of cold to initiate root formation, so plant as early as possible once soil is workable. Push sets into the soil, so just the tips are visible with pointed end upward. For an early summer harvest, plant from september to November, when the ground is fit to walk on. Push sets in as for the spring-planted crop. (RIEOG-355)
Seed Saving
Planting Out
Bed Prep & Soil Amendments
- a month, or two, before planting, spread a couple of inches of compost or well-aged manure over the planting area and turn under with a garden fork or till in
- do not use cedar- or redwood-based compost (PVFS)
- a week or so before planting or transplanting, spread a balanced fertilizer (such as 5-10-10) at the recommended rate on the label for vegetables.
- rake the soil to create a level planting surface
- if sweet onions are desired, do not add any sulfur; watch out for fertilizers that use the sulfur forms of nitrogen, phosphorous, or potassium
- use wire barriers or baskets to prevent underground varmints (gophers love onions)
- dig in some well-rotted manure or compost a few months in advance (GV-141)
- work a complete fertilizer (5-10-10) in at 3-4 oz per square yard (BBGS-129)
- onions like a relatively fertile soil, but avoid rich feeding, which encourages disease and cuts down on storage life; soil that has been fed for a previous crop, such as potatoes or brassicas, should suffice (RIEOG-306)
- no soil amendment needed if soil was improved for a previous crop; if not, add a low- to medium-fertility soil improver, depending on the soil condition (RIEOG-355)
Planting Out Transplants
When to Plant Out
- transplants can be planted out about a month before the last frost date
- transplants can be planted in the spring or fall, but fall (October – December) results in the largest, best-keeping onions
- Onions should be started early in the season; they don’t mind the cold (they need as much time as possible to grow big, lush green tops – the more top growth, the bigger the bulb) (BBGS-129)
- onions are cool-weather crops, and can go in as soon as the ground can be worked (BBGS-41)
- seeds sown indoors from February through March, can be planted outside in mid-April (RIEOG-300)
Transplant Prep
- onion transplants will be wilted & sad looking, but they are good to plant as long as the bulb is still firm
- trim the roots to 1/4″
- trim greens to 3″ (just want to reduce the amount of greenery that it needs to support while getting established)
- transplants will be fine for about two weeks once they are pulled out of the ground, but if it’s going to be longer, they can be refrigerated or just mound soil around the roots to keep them moist until they can be planted
Bed Spacing
- space standard varieties 4″ apart
- larger varieties should be spaced 6″ apart
- if you want to pick young onions as scallions, then you can space them 2-3″ apart and thin them to 4-6″ as you harvest scallions
- can be planted at 3″, if smaller onions desired
- biointensive: 4″ apart in each direction, resulting in an offset grid pattern
Row Spacing
- for growing in standard rows, space them 12-18″ apart, but they do just fine in bed spacing, or wide rows (4′ wide beds)
- 18″-24″ (Peaceful Valley)
- for raised beds 20″ wide, plant onions in double rows, 4″ from each edge (they end up being 12″ apart) (Peaceful Valley)
- double rows 8″ apart, with 1-2 feet between the double rows (Kitchen Gardener)
- rows are easier to weed than beds (Kitchen Gardener)
Planting Depth
- 1″ deep, or at about the same level they were growing (All the Onions)
- 1-2″ deep, to the top of white section (Peaceful Valley)
- 1/2″ deep (Kitchen Gardener)
Planting Out Sets
When to Plant Out
- Sets are best if planted in the spring; fall planted sets tend to bolt when the days lengthen and warm in the spring
- sets should be planted in the spring
- fall planted sets can tend to bolt when the days start getting longer in the spring
- onions are cool-weather crops, and can go in as soon as the ground can be worked (BBGS-41)
- Plant sets in spring for late summer and early fall harvests. Hardy Japanese varieties can be planted in fall to overwinter and be harvested in early to midsummer, but some may be lost in the cold weather, and they can be more susceptible to disease in the cold (GV-141)
- Onion sets can be planted outdoors as much as a month before the last frost date (BBGS-130)
Bed Spacing
- plant onion sets 1″ deep and 1-3″ apart
- harvest young plants to use as scallions, thinning the remaining onions to 3″-4″ apart
Container Gardening
Routine Cultivation & Maintenance
Water Requirements
- even moisture is needed to grow well
- soil surface should be evenly moist
- onions require 1″ water per week
- regular irrigation is necessary anytime rainfall is less than 1″ per week
- critical water period is during bulb formation
- 1″ of water per week is required to keep bulbs from splitting in hot dry soil, or from tasting bitter
- water stress results in smaller bulbs and stronger (more pungent) flavor
- water plants regularly until the tops start to yellow, then withhold water to get the skins to cure for better storage
- Peaceful Valley recommends not withholding water at all before harvesting
- ease up on fertilizing and watering when the leaves start to yellow to encourage dormancy (Kitchen Gardener)
Fertilization Recommendations
- onions need lots of phosphorous while growing
- 1 month or so after the onion has been growing, side dress with fertilizer or do a foliar feeding of liquid seaweed or fish emulsion; repeat in another month
- avoid giving too much nitrogen; you still want to see good green growth, but too much will make the bulb smaller
- stop feeding about 30 days before harvest, or as soon as the necks start feeling soft (the plant falls over at the neck when it’s grown the bulb as much as it can) this helps to keep the flavor on the sweet side
- avoid sulfur if sweet onions are desired
- 5-10-10 fertilizer (high on phosphorous, not too heavy on nitrogen, adequate potassium)
- too much nitrogen results in too much foliage production, not enough bulb formation
- adequate potassium is required to keep the necks from thickening and to make them store better
- side dress with fertilizer or manure when the bulbs start to swell
- ease up on fertilizing and watering when the leaves start to yellow to encourage dormancy (Kitchen Gardener)
- After the onions have been growing a while, they stop putting energy into their tops. This comes from a signal, which is a combination of increasing temperature and the number of hours a day the sun shines. At this point, they shift gears and the energy from the leaves is transported down to make a bulb (BBGS-129) I’m guessing this would mean that fertilizing after this point would not be useful
- onions like a relatively fertile soil, but avoid rich feeding, which encourages disease and cuts down on storage life; soil that has been fed for a previous crop, such as potatoes or brassicas, should suffice (RIEOG-306)
Mulching & Weeding
- weeding is very important, since they are the least tolerant of crowding of all the vegetables
- if you use a cultivator for weeding, keep it very shallow so you don’t hit the onion roots
- don’t hill soil or mulch up around the plant, as they do better growing at or near the surface
- for the largest onions, pull the soil away from the top 2/3 of the bulb
- a thin layer of mulch (1-2″) of fine compost or chopped leaves helps keep the soil moist and reduces weeds, but as above, pull the mulch away from the base once the bulb starts forming
- onions should be mulched deeply (up to 8″ deep) in cold winter areas, but only lightly mulch in milder climates
- mulch suppresses weeds, maintains soil moisture and prevents heaving (onions work their way out of the soil during extreme temperature cycles)
Plant Maintenance
- if a flower stalk gets sent up (called bolting) when it starts to warm up, it’s time to harvest. The energy and resources to flower come from the onion bulb. bolted onions won’t store, so eat them as soon as possible. Some sources say if the flower stalk gets cut off early enough, the bulb will still grow
- as the onion matures, pull the soil away from the bulb, leaving only the roots and bottom of the bulb covered
- when the leaves have turned yellow and about a quarter have fallen over, bend tops over to direct energy from the leaves into the maturing bulbs
Support
Winterizing
Companion Planting
Helpful Companions
- Onions are thought to be helpful in warding off a variety of pests when interplanted among other crops, but due the the heavy competition, big bulbs won’t form
- Plant throughout the garden, except with beans
Harmful Companions
Companion to..
Pests, Diseases & Problems
Common Pests
- Onion maggots: if these are a problem in your area, plant later in the spring and/or use floating row covers to prevent the flies from laying eggs
Common Diseases
- onions like a relatively fertile soil, but avoid rich feeding, which encourages disease and cuts down on storage life (RIEOG-306)
Symptoms
Whole Plant
Leaves
Stem/Trunk
Flowers
Fruit
Roots
Harvesting & Storage
Edible Parts of the Plant
Yield
Days to Harvest / Harvest Timing
- fall-planted transplants will be ready to harvest in June or July
- Onions can be harvested at any time: young ones are called scallions or green onions (PVFS)
- Fall-sown varieties are harvested in early to mid-summer (GV-143)
- Spring planted sets will be ready to harvest between midsummer and early fall (GV-143)
- if sown in February through March, harvest will be from July through October (RIEOG-300)
- General guidelines (RIEOG-355):
- Spring-sown: 20-24 weeks
- Autumn-sown: 42 weeks
- Spring planted sets: 18-20 weeks
- Autumn planted sets: 36-38 weeks
- Bunching Onions can be harvested at any time, but you’ll find the first handfuls in early spring have the best flavor (BBGS-130)
Cues to Harvest:
- when the leaves have turned yellow and about a quarter have fallen over they will be ready to harvest in a few days, depending on the weather
- when the tops are brown and quite dry, they are ready to harvest
- fall-planted sets will start bolting in the spring, so watch for these and harvest & eat asap as they don’t keep once bolted
- if a flower stalk gets sent up (called bolting) when it starts to warm up, it’s time to harvest. The energy and resources to flower come from the onion bulb. bolted onions won’t store, so eat them as soon as possible
- at full maturity, the plant stops producing inner leaf blades, and the neck weakens, falling over. this is the plant going into dormancy (allowing the onion to go dormant before harvesting results in the most optimum storage length)
- Bulb onions are harvested once the tops fall over and begin to turn yellow VG
Harvest Methods
- when they are ready to harvest, bend the tops that haven’t fallen over to stop the plant from directing energy (or sap) to the leaves while the bulb matures (bending over the tops too early results in rot – the neck should be hollow and dried out, weakened, before manually bending over)
- if the onions have been allowed to mature and the tops are brown and dry, they should come easily out of the soil
- lift the bulbs and leave them in a shaded, airy spot to dry, just long enough to dry any dirt left on the roots
- lay the onions in single layers, but with the tops of one row over the bulbs of another to shade them from direct sunlight, or indoors where it’s warm and dry
- curing takes about 3 weeks
- when outer skins are dry, complete the harvest by clipping the roots, wipe off remaining soil, and cut the tops back to 1″ above the bulb
- dig the onions up with a garden fork and lay them out in the sun for several days; this will create an outer skin VG
Storage of harvest
Fresh
- onions keep best when kept separated; individually wrapped (foil) onions can last up to a year in the refrigerator
- onions with thick necks won’t store long, so eat them first
- braid the long dry tops and hang for storage
- store onions in trays, net bags, old stockings or anywhere they get a little air for curing
- if storing in mesh bags or nylons, tie a knot in between bulbs to keep them separated, then suspend them from a hook
- cure the onions until the necks are small and the skins are brittle
- optimal storage: dark, cool, dry (36-45 deg F, 60-70% humidity)
- thick-necked onions will not keep as long as thin-necked ones
- sweet varieties don’t keep as long as regular varieties
- pungent onions keep better than sweeter varieties because of their lower water content
- pungent, non-sweet onions become sweeter in storage
- long-keeping onions are firm, dry bulbs, with tight necks and layers of dry yellow or brown skin
- Once they have a nice outer skin, cut the tops off (leaving a couple of inches) and store them in a cool and dry spot; netted bags are perfect for storing onions VG
Canned
Frozen
Pickled
Dried
Cooking
Nutritional Benefits & Values
Toxicity
Cooking
Preparation
Cooking Methods
Recipes
Resources
Information for this article was taken from these sources: