 Bell peppers, or sweet peppers, are a great addition to not only your vegetable garden – they grow into a beautiful plant with dark green, glossy leaves, with bright fruit that come in reds, oranges, yellows, even purple and mauve! Unless you live in a warm environment, plan to grow them from seedlings.
Table of Contents
Botanical Information
Taxonomy
- Plantae Angiosperms Endicots Asterids Solanales Solanaceae
- Capsicum annuum
- Bell peppers are a cultivar of the Capsicum annuum species
- Members of the nightshade family, relatives are eggplant, potatoes, tomatoes, tomatillos, and ground cherries
- Also known as sweet peppers or sweet bell peppers
History
- Brought by Columbus back from the New World to Europe. They were grown for generations by the Omecs, Totecs, and Aztecs. (KG)
- native to tropical America (Mexico, Central America, and the northern part of South America).
Physical Description
- tropical or subtropical, so they need heat (but not too hot) & humidity to grow well
- small, erect shrub; grows 12 to 48″ tall.
- white star-shaped blossoms, also come in pinks and purples, up to an inch across.
- pert, glossy green leaves
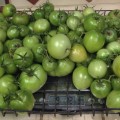
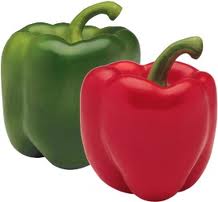
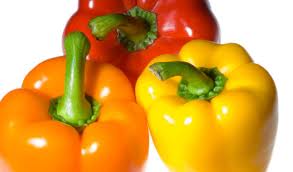
- Fruits of the plant, known as Bell peppers or Sweet Peppers to differentiate between them and chile peppers, come in green, their edible unripened fruit, yellow, orange, red, mahogany, and dark purple
- Fruits can grow to up to 9″ long
- Height: 2′-3′
- Breadth: 24″
- Root Depth: 8″, some to 4′
- bell peppers need a long growing season to do well
Varieties & Cultivars
Colors Available
- Green (all peppers can be eaten green (unripe)
- Yellow (including gold – which tend to be softer when ripe, so harvest just when they start to turn their final color – KG)
- Orange
- Red
- Mahogany
- Purple & Lavender
- White, Cream, and Ivory – rare colors in peppers, and only transitional (KG)
Varieties to Grow
Growth Requirements
Climate & Temperature Requirements
Temperature
- Peppers are pretty picky about climate
- warm-season crop; very tender to frost & light freezes. (A-Z)
- Although they can be grown perennially in warm climates, it is best to treat peppers as annuals and replant each year with vigorous new plants. (VGPS)
- 65-95°F (A-Z)
- Wait to plant out peppers until nighttime low temperatures stay above 50°F to plant out. soil should be 65°F; cool conditions slow growth and fruiting of peppers; fruiting also stops when temperatures are too high; using plastic around cages is good to give them protection from the cold until days are above 80°F and nights are above 60°F. Use again at the end of the summer & early fall when temperatures start to decline again. Temperatures above 90°F are hard on peppers, causing blossom drop and sunscald. Shelter them by planting between rows of tall sunflowers or trellised tomatoes that will provide afternoon shade when temperatures are peaking. If that’s not possible, see “Planting in Pairs” under Bed Methods. Also, you can sprinkle peppers lightly with a cooling spray of water in the middle of the day (not in humid areas). Or you can cover them with shade cloth. To prevent the soil from overheating, mulch with several inches of organic, cooling mulch. (VGPS)
- They need heat (and humidity) since they are tropical and subtropical plants; choose a sheltered and sunny area, whether growing them in the ground or in containers. Cover them if the weather turns cold.(GV)
- Ideal: Days in the 70s and 80s, nighttime temps in the mid-60s and low 70s. Traditional cultivars will drop their blossoms and won’t form new ones until the temperatures are right again. New cultivars have been bred to handle the temperature problem. Warm the soil with black paper or plastic mulch, if you live in a marginal climate. Shelter them through cold spells with floating row cover or cloches. Remove the mulch if it warms up, but replace with organic mulches like grass clippings or straw. (KG)
- 70-85°F; if the temperature rises over 95°F, sprinkle plants with water in the afternoon to try to prevent blossom drop (A-Z)
- Satisfactory range = 65-85°F; optimal range = 70-75°F (HGMV)
- Peppers grow very slowly, or not at all, in cold soils, so resist the temptation to plant outside too early (TSC)
Humidity
- They need humidity (and heat) since they are tropical and subtropical plants (GV)
- In humid climates, it’s best to grow sweet pepper plants separated from chile peppers. (KG)
Day Length or Light Requirements
- Peppers need full sun to produce a bountiful crop of large, firm fruit.(VGPS)
- Very susceptible to sunscald, so good foliage canopy cover is good. Some shade in very hot areas is good.(VGPS)
Site Conditions Favored
- In marginal climates, give peppers the sunniest spot in your garden – next to your eggplants.
- In hot climates, you can grow almost any cultivar, but pick those whose leaves protect fruits from the scalding sun. You can also intercrop them with tall tomatoes which will give filtered sunlight. Or drape 30-40% shade cloth over the plants once peppers start to develop; remove it when the sun starts it’s decline to autumn. Sprinkling the plants with cold water during the heat of the day also helps prevent blossoms from dropping when it’s too hot. (KG)
- In humid climates, it’s best to grow sweet pepper plants separated from chile peppers. (KG)
- choose a sheltered and sunny area, whether growing them in the ground or in containers.
Soil Requirements
Soil Texture
- plant peppers in well-drained soil. If you have clay soil or poor drainage, make raised beds for planting. Beds 6″ high will suffice because peppers tend to be shallow-rooted. (VGPS)
- They like light, fertile soil that retains moisture. (GV)
pH
5.5-7.0 (A-Z)
Nutrient Requirements
- soil should be fertile, enriched with lots of organic matter.(VGPS)
- Medium-heavy feeder; high N; rotted manure or compost; some soils may need calcium. (A-Z)
Propagation
Methods of propagation
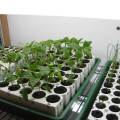
Seed
- Timing:
- sow seeds indoors 8-10 weeks before planting-out date. Add 2 more weeks if your seed-starting area is on the cool side
- The earlier in the season you can start, the better your chances that the fruits will ripen fully later on in the year. This is generally early spring
- Germination should take about 14 days (SSE)
- start seeds indoors 28-35 days before last frost date. You can keep sowing seeds up until 115-148 days before first frost date (A-Z)
- Seeds should germinate in 10-12 days (A-Z)
- 8-10 weeks before your last frost (TSC)
- Days to emergence are 8-25 days. Germination rates may be erratic if soil is allowed to dry out (TSC)
- How:
- Sow 4 seeds per cell or container; you’ll thin to the strongest seedling. Minimizing root disturbance is important, so choose a starting container that will minimize it
- Sow seeds thinly in seed trays or modules
- Start seeds indoors, no matter where you live
- Set into 2- to 3-inch pots
- Sow seed 1/4″ deep and use pots at least 1 1/2″ wide to minimize transplant shock, make a stockier plant, and encourage earlier production
- Use a large enough container so the pepper has room to grow until it’s time to plant out (3-3.5″ pot)
- Using a sterile seedling mix sow seeds 1/2 inch deep (TSC)
- Temperatures:
- set seed flat in a warm place to germinate
- maintain 64-70°F until germination
- don’t let them get below 61°F at night and 64°F in the day
- For maximum harvest, give seedlings warm days and nights – aim for a steady 80°F
- temperature for germination is 80-90°F, so bottom heat or heat from above with incandescent lighting is needed. (VGPS)
- seedlings like it to be 75-80°F in the daytime and 60°F at night.(VGPS)
- germination temperatures: minimum = 60°F; optimum range = 65-95°F; optimum = 85°F; maximum = 95°F (HGMV)
- Optimum soil temperature for germination is 70-85°F (TSC)
- Light:
- Make sure the seedlings have plenty of light (TSC)
- Watering:
- then don’t let the soil dry out
- Germination rates may be erratic if soil is allowed to dry out (TSC)
- Seedling Maintenance:
- Pinch off any small fruits that set before planting out
- Feed seedlings weekly with half-strength liquid fertilizer until transplanted. (A-Z)
- Once they have been up-potted to a 3″ pot, they should be grown at 70°F during the day and 60°F during the night (TSC)
- Give them an organic liquid fertilizer solution, such as 2-1-1 Earth Juice Grow fertilizer (TSC)
- Remember strong transplants perform best and will give highest yields (TSC)
- Growers report that the following cold treatment of seedlings significantly improves yields and early growth (see Transplanting or Potting Up section below):
- when the first leaves appear, lower the soil temperature to 70°F and ensure 16 hours of light with grow lamps
- when the first true leaf appears, thin seedlings to 2-3 inches apart or transplant into 4″ pots
- when the third true leaf appears, move the plants to a location with night temperatures of 53-55°F
- keep there for 4 weeks
- return seedlings to a location with average temperature of 70°F
- plant out 2-3 weeks after all danger of frost has passed; soil temperature should be at least 55-60°F for planting out, or the plants turn yellow, become stunted, and are slow to bear. (A-Z)
Cuttings
Haven’t tried this, nor have I seen any literature discuss growing peppers from cuttings.
Transplanting or Potting Up
- Pepper plants seem to be more susceptible to transplant shock than other vegetables. If they seedlings go into shock after planting, they may never recover completely. to reduce the risk of transplant shock, harden them off. (VGPS)
- Seedlings like it to be 75-80°F in the daytime and 60°F at night. water with lukewarm water; pinch off any small fruits that set before planting out. (VGPS)
- If seeds were sown in flats, when seedlings develop leaves that are large enough to handle, carefully prick them out and pot up into individual 3-3.5″ pots, then a few weeks later, when they are 3.5-4″ tall, pot them up into 8-9″ pots. (GV)
- should be 32-44 days after germination (42-56 days after sowing). This corresponds to 14-21 days after the last frost date. (A-Z)
- Wait until nighttime low temperatures stay above 50°F to plant out. soil should be 65°F; cool conditions slow growth and fruiting of peppers
- Plant them out in late spring or early summer, making sure there is no risk of frost.
- Don’t pot up and don’t harden off, but wait till the night air is consistently 65°F and above; the air temperature is more critical than the soil temperatures (KG)
- Some resources advise to not pot up bell peppers – simply sow them in a large enough container to not get root-bound by the time they can go into the ground.
- Once the seedlings have 2 sets of true leaves, they can be up-potted to a 3-inch pot (TSC)
Seed Saving
dry peppers in a window until they dry to brittleness. store the seeds in the freezer (air-tight container) until you are ready to start them next year. Don’t be afraid of trying this with hybrids, even though their seeds won’t grow true, they’ll be interesting. (KG)
Planting Out
Timing
- In spring, wait to set transplants in the garden until the soil is at least 65°F.
- Wait until nighttime low temperatures stay above 50°F to plant out. (VGPS)
- Gardeners in zone 8 and warmer can also plant bell peppers in late June or July for a fall harvest
- Daytime temps should be 70-80°F; nighttime temps should be 60-70° (lower temps can hinder fruiting later) (TNGC)
- Peppers grow very slowly, or not at all, in cold soils, so resist the temptation to plant outside too early. The timing for transplanting is perfect when the plants are just starting to become root bound, the garden soil has warmed to at least 60°F, and the nighttime temperatures remain above 50°F. Transplant peppers outside 2-3 weeks after tomatoes, typically the first half of June (TSC)
- To avoid transplant shock, harden off seedlings for at least 1 week before planting out. To harden them off, set plants outside during the day, but bring them in each evening. (VGPS)
- Planting out is best done in the late afternoon or on a cloudy day to avoid shock from heat or sunlight in the first day out. (VGPS)
Bed Prep & Soil Amendments
- don’t add extra nitrogen (N) or they will be less likely to flower
- Bed should be rich and well-supplied with nitrogen, such as blood meal, fish bone meal, or composted chicken manure. This helps the plants make vigorous vegetative growth for their first 6 weeks in the garden. (TSC)
- At planting time, use about 1/2 cup of nitrogen fertilizer side-dressed below and around each plant (TSC)
- Add one generous shovelful of compost to each hole, along with some bone meal. (VGPS)
- prepare beds by growing a cover crop and turning it under before planting (VGPS)
- to boost phosphorous levels, add bone meal to each planting hole along with one shovelful of compost; Add alfalfa, cottonseed, or fish meal to the soil at planting (VGPS)
Conventional Bed Spacing
- 12-15″ (TNGC)
- 12-18″ apart in rows 24-30″ (TSC)
- at least 20″ apart (GV)
- 12″ apart in rows 18-36″ apart – “Peppers do better when planted close together” (A-Z)
Alternative Bed Methods
- Grow Biointensive method: hexagonal layout, on 12″ centers, filling a bed up to 100 sq ft (no wider than 4-5′); 159 plants can fit in this arrangement, yielding up to 204 lbs of bell peppers (HGMV)
- Raised Bed: raised beds for peppers need only be 6″ high because peppers are shallow-rooted (VGPS)
- Planting in Pairs: if you live in an area where temperatures regularly rise above 90°F, and cannot shade the peppers from afternoon peak sunlight & temperatures, this is a good method to protect them from the heat
- set 2 plants 6″ apart, then plant the next pair 2′ away
- this creates better cloak foliage to shield fruits from sunscald
Planting Depth
- Set the plants with the top of their soil ball level with the garden soil surface.
- Peppers don’t form roots along the stem like tomatoes do, so don’t plant them any deeper than they were in the seedling pot. (VGPS)
Container Gardening
- Grows well in 3- to 5- gallon containers (KG)
- containers are a good choice for peppers, especially in areas where low nighttime temperatures are a danger (GV)
- Combine equal parts potting mix & compost, and add fish meal or alfalfa meal to the mix, too. Be sure to provide a cage or other support. (VGPS)
- Peppers are perfect container plants, especially if you can place them in a warm, sunny, sheltered spot (GV)
Routine Cultivation & Maintenance
Water Requirements
- bell pepper plants will not tolerate drying out – blossoms drop and fruit may also (TNGC)
- may need to water peppers more frequently as the summer heat sets in (TNGC)
- keep peppers uniformly moist throughout the growing season (TSC)
- peppers need steady moisture as fruits develop, but the plants can’t tolerate being waterlogged (VGPS)
- as the peppers ripen, cut back on watering for best flavor (VGPS)
- water on a regular basis (GV)
- if you allow the plants to dry out, the flower buds and leaves may drop off (GV)
- a layer of mulch will help prevent moisture in the soil from evaporating (GV)
- give peppers ample water to create well-developed root systems (KG)
- medium-heavy water requirements (A-Z)
Fertilization Recommendations
- Fertilize once per week because peppers are heavy feeders; especially important when blossoming (TNGC)
- When the plant starts to flower, side-dress with 1/2 cup complete fertilizer (TSC)
- Unless your soil is perfect, peppers will need fertilizing to fuel both foliage cover (to prevent sunscald) and bountiful fruiting (VGPS)
- Side-dress with compost or blood meal (2 Tablespoons per plant) when the first fruits form – or- drench the soil with fish emulsion or kelp solution every 3-4 weeks (2 cups per plant) (VGPS)
- As soon as the fruits begin to set, water with a general fertilizer or liquid tomato fertilizer every 2 weeks (GV)
- Side dressings should be applied at blossom time and 3-weeks later (A-Z)
- Apply liquid seaweed 2-3 times per season (A-Z)
- At blossom time, try spraying leaves with a weak epsom salt mixture (1 teaspoon per quart) to promote fruiting (A-Z)
Mulching & Weeding
- Mulch is very important in areas with hot, dry summers; peppers can transpire too much water during the day (TNGC)
- Using Black or Silver Mulch is recommended (TSC)
- Week on a regular basis (GV)
Pinching or Pruning & Dividing
- pinch off all flower buds until August, so the plant can focus on growing large instead of early fruit production; this method results in about one ripe pepper per week until frost (TNGC)
Support
- it’s critical to support pepper plants to prevent branches from breaking off under the weight of ripening peppers (VGPS)
- Even if the branches don’t break, the weight of the peppers can make the plant sprawl or lean on the ground, which opens the plant up to sunscald and disease (VGPS)
- Stake up plants to give them a degree of support if they need it, and to keep peppers from trailing on the ground (GV)
- Place three or four canes around each plant in a sort of upside-down wigwam shape, and loosely tie in the stems with string (GV)
Sun or Heat Protection
- Be mindful of high daytime temperatures as the season heats up, since these hot-loving plants can get too hot (TSC)
- when summer temperatures rise above 90°F, take care to shade bell peppers
- Misting in the afternoon will also bring down the temperatures for the peppers in dry areas, with the side benefit of bringing up the humidity; avoid this if you live in a humid climate
- Mulching or shade to keep the soil cool, since they are shallowly rooted. When the roots dry out, the flower buds and leaves may drop off
- If summer temps are regularly above 90°F, then consider growing via the following alternative bed methods:
- Biointensive Method
- Planting in Pairs
Winterizing
- Peppers are tender annuals in non-tropical areas, so as soon as the first frosts hit, the plants and fruit will be affected
- remove plants and harvest right before the frost hits
- make sure to pull the plants out, including roots, then clean the planting bed of any pepper debris to prevent diseases from increasing or spreading next season
Companion Planting
Helpful Companions
- Basil
- Buckwheat (attract beneficial insects)
- Caraway
- Carrot
- Catnip
- Coriander (Cilantro) (attract beneficial insects)
- Dill (attract beneficial insects)
- Eggplant
- Nasturtium
- Okra
- Onion
- Parsley
- Tansy
- Tomato
Harmful Companions
- Fennel
- Kohlrabi
Companion to..
Pests, Diseases & Problems
Prevention
- Problems with peppers tend to be more environmental than pest- or disease-related. They like temperatures and humidity to be just right (VGPS)
- Peppers share most of the pests and diseases of tomatoes (TSC), although they seem to tolerate them better than both tomatoes & eggplants. (VGPS)
- Floating row covers will thwart pests if used early in the season (TSC, A-Z)
- proper sanitation (cleaning up dead leaves, or fallen fruit) is very important to preventing disease (TSC)
- don’t plant peppers in the same spot for 2 seasons and rotate with a green manure crop (TSC)
Common Pests of Peppers
Common Diseases of Peppers
Symptoms
Whole Plant
- Growing tips dieback = spotted wilt virus
- New seedlings eaten
- Stunted plant
- Soil pH is too acidic; other symptoms include yellow spots on leaves and puckering (VGPS)
- Transplant shock (VGPS)
- Cold nighttime temperatures (VGPS)
- Cold soil temperatures (VGPS)
- Leafhoppers
- Curly Top Virus
- Root Knot Nematode
- Tobacco Mosaic Virus
- Tomato Spotted Wilt Virus
- Wilting plants
Leaves
- Black coating on lower leaves = aphids
- Leaves roll up
- Heavy rain
- If only on the sunny side of the plant, the sun was too strong (VGPS) = shade in afternoon
- Rolling leaves are not a bad problem, they generally recover, and if they don’t, production will still be good (VGPS)
- Leaves skeletonized or chewed up
- Small holes in leaves
- Spots on leaves
- Early blight
- Bacterial spot (wart-like spots)
- Cercospora leaf spot (water-soaked spots)
- Tomato spotted wilt virus (small dark spots or flecks on upper young leaves, which may also turn bronze)
- White powdery growth on underside of leaves
- Yellow mottling of leaves
- Yellow spots on upper side of leaves
- Yellow spots and puckering of leaves
- soil is too acidic; plant may also be stunted
- Leaves with yellow spots fall off plant
- Yellow stippling on leaves
- Leafhoppers (jostling or spraying the plant results in tiny insects jumping off the plant)
- Spider mite (very fine webbing, almost invisible, will be seen on the underside of leaves)
Stem/Trunk
- long necrotic streaks extending to the growing tips: Tomato spotted wilt virus
Flowers
- Blossoms drop off plant
- Temperatures are too high (above 90°F)
- Shade the plants in the afternoon and sprinkle with water (VGPS)
- If the temperature rises over 95°F, sprinkle with water in the afternoon (A-Z)
- Temperatures are too low (below 60°F)
- Use row covers for insulation, or wrap plastic around cages (VGPS)
- Water stress
- Monitor soil moisture regularly and water when the top inch of soil is dry (VGPS)
- Tarnished plant bugs
- Temperatures are too high (above 90°F)
Fruit
- Brown or tan spot on or near blossom end of fruit (or on sides) = blossom end rot
- Few fruits form
- Tarnished plant bugs
- Excess nitrogen (N) – you will also see lots of lush leaf growth, but poor fruit set (VGPS)
- Fruits drop early
- look for holes in the pepper; may be a sign of pests feeding inside the pepper (see “Holes in peppers”)
- Holes in peppers
- Small, flattened peppers
- Poor pollination, usually caused by poor light or low temperatures; pick the small fruits because they won’t get much bigger and it will encourage more fruits to be set; try tapping open flowers during midday, as long as the weather is dry, to improve pollination (VGPS)
- Water-soaked spots on peppers
- White patches on peppers
- Sunscald (if no other signs of disease are present); caused by too much strong sun exposure; areas become dry and papery or water-soaked; keep nitrogen (N) levels up enough to keep foliage production up (VGPS)
- Yellow rings on peppers
Roots
- brown and wet roots: fungal foot rot
- nodules on roots: root-knot nematode
Harvesting & Storage
Edible Parts of the Plant
Only the fruit of the pepper plant is edible. As with all of the nightshades, the rest of the plant (leaves, stems, flowers, roots) contains toxins.
Typical Consumption Rates
- plan an average of 5-6 plants per person (A-Z)
- 7 lbs of bell peppers are consumed on average by person in US (USDA 2005, 2003)
Yield
- Peppers can grow up to 9″ in length, depending on the variety
- using the GROW BIOINTENSIVE method (above):
- inexperienced gardener: 7 oz per plant
- average gardener: 14 oz per plant
- experienced gardener: 1.25 lbs per plant
Days to Harvest / Harvest Timing
- late summer, early fall
- bell peppers can be harvested green (when young), but they get sweeter as they ripen to yellow, orange, red, dark purple, or even brown, depending on variety
- the riper they are, the sweeter they taste
- fruit set after late August will usually not fully ripen (TSC)
- peppers will ripen off the vine, so pick all of your green ones before frost
- the days-to-maturity listed on the seed packets and in the seed catalog descriptions are the days from planting out to availability of green peppers; add 4-6 more weeks fro ripening. (KG)
- When to harvest is a balancing act. If you pick them early, you will have more production, but if you wait till their fully ripened, they will be sweeter and better-tasting. (GV)
- If you harvest all of the first fruits from your plants in August, you’ll considerably increase future yields. (KG)
- Pick the first fruits as soon as they’re usable in order to hasten growth of others. (A-Z)
- Green Bell Peppers can be harvested at any time
- Ripe Bell Peppers can be harvested when they are just starting to turn color, then ripen the rest of the way on the kitchen counter. (VGPS)
- The deeper the color, the richer the flavor and store of vitamins A and C. (KG)
- When sweet peppers are firm, full-sized and crisp-looking, they are ready for harvesting (the color of the pepper isn’t always a reliable indicator) VG
Harvest Methods
- Harvest by the time they are just starting to turn color to encourage more fruit set. (VGPS)
- Cut the pepper at the stem, leaving 1″ of the stalk remaining on the fruit. (GV)
- cut peppers with a bit of stem attached, rather than twisting or pulling them from the plant. (KG)
- Cut the fruit with 1″ or more of stem for better storage. (A-Z)
- Cut them from the plant with a knife — don’t pull VG
Storage of harvest
Fresh
- can be kept in good condition for at least 40 days at 32°F and 95% relative humidity (TSC)
- Refrigerating them slows ripening but also causes chilling injury. (VGPS)
- Eat peppers promptly: as with peas and sweet corn, the sugar they contain begins to turn to starch after harvesting. (GV)
- Cut the fruit with 1″ or more of stem for better storage. Refrigeration of sweet peppers is too cold and encourages decay. (A-Z)
- Optimum Storage Temperature: 45-55 degrees F
- Humidity: 90-95%
- Storage Life: 2-3 weeks
Canned
- tastes good; 12-month shelf-life (A-Z)
Frozen
- Peppers can be frozen whole, with stems & cores removed, or chopped to any size. Good for use in cooked dishes.
- taste is fair; 3-month shelf life (A-Z)
Pickled
- taste is excellent; 12+ month shelf life (A-Z)
Dried
- taste is excellent; 12-month shelf life (A-Z)
Cooking with Bell Peppers
Nutritional Benefits & Values
- Protein per pound: 4.5 grams (green); 5.1 grams (red) (HGMV)
- Calories per pound: 82 grams (green); 122 grams (red) (HGMV)
- Calcium per pound: 33 mg (green); 47 mg (red) (HGMV)
- For maximum vitamin C content, wait until peppers have matured to red or yellow colors. (A-Z)
- The deeper the color, the richer the flavor and store of vitamins A and C. (KG)
Toxicity
- Peppers are not toxic, but the rest of the plant is; avoid eating the stem, leaves, and flowers
Cooking
Preparation
- bell peppers can be eaten both raw and cooked
- wash and remove core, white ribs, and seeds
- slice lengthwise or cross-wise for eating with dips
- chop or slice for salads
- chop or dice for sauces, soups, or salad dressings
- slice lengthwise or cross-wise for stir-fry
- quartered, or halved for smaller peppers, when grilling, so they don’t fall through the grates
Cooking Methods
- bell peppers can be cooked by any method – even laid skin-side-down on hot coals or flame from gas stove. Common methods are grilled, sauteed, roasted.
- stir-fry retains colorful skin and carmelizes sugar
- stuffed then baked
- grilled directly, or added to pochettes
Recipes for Bell Peppers
Resources
Information for this article was taken from these sources.