
Ask any veggie gardener what their favorite crop to grow is and you are likely to get tomatoes. 85% of the estimated 29 million gardeners grow tomatoes (NCG). Flavor is compromised, as well as variety, when you rely on store-bought, commercially grown tomatoes. They are also expensive, so it makes sense to grow your own. Here’s how to grow tomatoes!
Table of Contents
- 1 Botanical Information on Tomatoes
- 2 Tomato Types and Varieties
- 2.1 Tomato Diversity
- 2.2 Heirloom vs. Non-heirloom:
- 2.3 Cultivars by Growth Habit:
- 2.4 Cultivars By Tomato Size:
- 2.5 Cultivars By Tomato Shape
- 2.6 Cultivars By Maturity Rate:
- 2.7 Cultivars By Disease Resistance:
- 2.8 Cultivars by Environmental Conditions:
- 2.9 Cultivars by Cultivation Practices
- 2.10 Tomato Colors Available
- 2.11 Tomato Varieties
- 3 Growth Requirements of Tomatoes
- 4 Tomato Propagation
- 5 Planting Out Tomatoes
- 6 Growing Tomatoes in Containers
- 7 Routine Cultivation & Maintenance for Tomatoes
- 8 Pests, Diseases & Problems
- 9 Companion Planting
- 10 Harvesting & Storage of Tomatoes
- 11 Cooking Tomatoes
- 12 Sources
Botanical Information on Tomatoes
Taxonomy
- Family: Solanaceae or Nightshade
- Latin Name: Lycopersicon esculentum
- Other Members: eggplant, peppers, potatoes (although they prefer different soil conditions), tobacco, ground cherries, cape gooseberries. Also includes some poisonous weeds (GGC)
- Tomatoes are categorized by growth habits and shapes/sizes.
History
Physical Description
- semi-tropical perennial vine or shrub that’s grown as an annual in non-tropical areas(NCG)
- Originated in the Andean mountains, but the fruits were smaller than cherry tomatoes. They were ignored by the incas, but birds carried the seeds to Central America where it was cultivated for it’s decorativeness by the pre-Mayan Indians. The Aztecs were the ones to start eating it as Tomatl or Xtomatl. Spanish conquistadors brought it back to Europe. Colonists brought it to the US. (NCG)
- Heat loving (GGC)
- Subject to many fungal diseases (GGC)
Tomato Types and Varieties
Tomato Diversity
There is a staggering amount of diversity in the tomato world. They are divided by many attributes:
- size (cherry, slicer, beefsteak, etc),
- shape (roma, pear, pleated, etc),
- color (red, pink, yellow, etc),
- growth habit (vine (indeterminate) or bush (determinate),
- and by when they ripen (early, mid-season, or late).
- But the tomato category that gets the most attention these days, is heirloom vs. hybrid.
Heirloom vs. Non-heirloom:
Although it’s heavily debated, the standard definition of an heirloom variety, for any plant species, is that it is a cultivar that has been grown for many generations, the seeds passed down from gardener to gardener through the years. For a variety to be an heirloom it must be open-pollinated – or else there would be no viable seed to save. However, some schools of thought add an age requirement – such as, it’s been around for at least 45 years. The benefit of heirloom varieties is that over time, through selective breeding, the plant adapts to the regional climate and soil that they have been grown in; this leads to the plant being resistant to local temperature extremes and even pests that are common to that region. Heirloom varieties are not commonly used in commercial agriculture due to their inconsistent fruit shapes and production. They are also more easily damaged by mechanical picking machines, and don’t keep or store well. Varieties that are used in commercial agriculture are hybrids that have been developed for high production, disease-resistance, storage-length, herbicide-resistance, and transport. These hybridized varieties are not-necessarily evil, but the practices aren’t sustainable (monoculture, herbicide use, trucking produce for long distances). But the biggest problem with commercially grown produce, in my opinion, is that it doesn’t taste as good, since they are not selecting for taste as much as the other traits, and because commercial growers have to pick them so early in order to transport them. So, in general, I prefer to purchase produce that has been grown in my area from the local Farmer’s Markets. Even some of our local grocery stores are now carrying produce from small local farmers. I am fortunate to live very close to the area that grows most of the produce for the western United States, and sometimes the entire US. As for what I choose to grow in my own garden, I grow mostly heirlooms, because there is way more variety to choose from and they are very tasty, but I also grow a few hybrids, if they are unique or interesting.
Cultivars by Growth Habit:
- Indeterminate Varieties (also known as Cordon or Vine Tomatoes)
- Dwarf Indeterminate
- Determinate Varieties (also known as Bush Tomatoes)
- Intermediate Varieties:
- lesser-known type which grows like a bush, but gets so tall that staking is required, like vines
- side shoots should not be pruned
- Flavor components are produced in the leaves, then carried to the fruit. This means that indeterminate varieties, which have more leaves to fruit, taste the best. This goes for peppers, too. (GGC)
- Semi-determinate Varieties: self-limiting height, but grow somewhat like a vine, with sideshoots.
Cultivars By Tomato Size:
- Currant-sized
- Cherry tomato
- Plum, Roma or paste tomato
- thick-walled tomatoes have less juice, so they are better for sauces
- take longer to ripen
- Slicing Tomato
- Large Beefstakes:
- Giant ones weighing up to 16 oz.
- take longer to ripen
Cultivars By Tomato Shape
- Round
- Oblate (looks like a squashed round ball)
- Ribbed or pleated
- Plum or oxheart
- Cherry
- round
- pear
- currant
- grape
Cultivars By Maturity Rate:
- Early Season
- Mid Season
- Late Season
Cultivars By Disease Resistance:
There are hybrids that are bred for disease resistance, so this leads to further categorization. On the plant label, if you see one of the following abbreviations, the plant is resistant, or more tolerant of, the disease from the list below. Some heirloom tomatoes carry a natural resistance to a disease; these are the plants they start from when selecting for that disease-resistance.
- V = Verticillium Wilt
- F = Fusarium Wilt (F1 & F2)
- FF = Fusarium Wilt
- N = Nematode Resistant (root knot nematode)
- T = Tobacco Mosaic Virus Resistance
- A = Alternaria Leaf Spot resistance (Alternaria Blight)
- ASC = Alternaria Stem Canker
Cultivars by Environmental Conditions:
- Hot weather: to deal with hot summers, grow small-fruited cultivars which will set fruit better, and crack less due to the heat. Cherry tomatoes, currants and pear-types all do well, as do plum, or roma, or paste tomatoes. Larger hybrids have been bred with heat resistance. Plant vigorous early varieties, along with a midseason heat resistant one at the same time. Pick fruits continually to get them out of the heat.
- Arkansas Traveler Pink Slicing Tomato
- Heatwave (TKG)
- Solarset (TKG)
- Better Boy (TKG)
- Kootenai (TKG)
- Black Plum Paste Tomato
- Cal Ace
- Homestead 24
- Ozark Pink
- Tropic
- Crimson Sweet Earlirouge
- Yellow Perfection Slicing Tomato
- Dry weather
- Humid weather
- Foggy conditions
- Short growing seasons (colder climates)
- Early Girl
- Nepal
- Crimson Sweet Earlirouge
- Oregon Spring Bush
- Season Extension, Cold-Season Gardening
- For fresh tomatoes in winter (TKG):
- pick a variety that has a long maturity length and not terrific flavor, nor rich color (Burpee’s Longkeeper, for example).
- Start later in the season, like late spring
- pick tomatoes before frost, while still green
- wrap the green tomatoes in paper and keep in a cool environment
- weeks or months later they will ripen
- For fresh tomatoes in winter (TKG):
Cultivars by Cultivation Practices
- Container Varieties:
- Balcony Tomato
- Burpee’s Pixie Hybrid
- Patio Hybrid
- Patio Princess Hybrid
- Tiny Tim
- Super Bush
- Small Fry
- Tumbling Tom
- Greenhouse Varieties: go for disease resistant cultivars
- No Supports (no trellises, cages, or stakes): choose Bush or Determinate varieties
Tomato Colors Available
- Red (standard)
- Pink
- Purple/black/brown
- Green
- White
- Yellow
- May be more resistant to potato blight than other colors (REOG)
- Orange
- Striped
- mottled
Tomato Varieties
Growth Requirements of Tomatoes
Climate & Temperature Requirements
Air Temperature
- Minimum air temperature: (if planted out when it’s too cold outside for the, tomatoes will be less productive)
- 50°F (BBGS)
- 45°F (REOG)
- 54°F (2-4 weeks after frost) (GGC)
- warmth needed for good production (REOG)
- to fruit well, tomatoes need the temperature to be 70-75°F (REOG)
- Temperatures over 95 degrees kill the pollen and prevent flowers from setting fruit (Matchstick). Production will start up again when temperatures drop. (G101)
- considered a tender crop: plant out 1 week after last frost
Soil Temperature
- at least 65°F (BBGS)
- at least 50°F (REOG)
- at least 55°F, even at night (GGC)
Humidity
Since tomatoes are from tropical & semi-tropical climates, areas with dry seasons commonly experience issues like powdery mildew and lack of production due to lack of pollination
Day Length or Light Requirements
- tomatoes need between 6 and 10 hours of sunlight daily (NCG)
- 8 hours of sunlight per day (GGC)
- Full sun
- good light needed for good production (REOG)
- The site should be in full sun; if using growing bags, a south-facing wall is ideal.(GV)
- Sunlight has the most profound effect of all of the environmental factors on tomato sugar concentration (Better Crops)
Site Conditions Favored
- tomatoes like a site that is warm, sheltered, and gets full sun
- Can be grown under cover (greenhouse) in large beds
- tomatoes do great in containers (see below for recommendations)
- bales of hay
Soil Requirements
Soil Texture
- well-drained soil
pH
- 6.5 (BBGS)
- 5.5 – 7.0 (REOG)
- 6.0 – 7.0 (GGC)
- 5.5+ (GV)
- 6.0-7.5 is the only acceptable range, per Thomas A. Zitter (Cornell University):
- “this range will keep nutrients available to the plants and is a good environment for helpful bacteria and fungi in the soil
- Too acidic (5.5 and lower) will encourage soil-borne diseases like Fusarium wilt and foliar pathogens like Botrytis gray mold
- Too alkaline, or basic (8.0 and up), will favor Verticillium wilt
- when pH is either too high or too low, nutritional disorders are invited, and plants will certainly be less productive
- in general, if your soil is too acidic, add lime; if it’s too alkaline, you must add sulfur”
Nutrient Requirements
- rich & fertile soil because they are heavy feeders
- fertile soil rich in organic matter (REOG)
- tomatoes do well following a cover crop of winter rye – green manure REOG
- Not particularly fussy about the soil, as long as it’s rich & fertile. Dig in well-rotted compost or manure to a depth of at least 12″ before planting or apply general high-phosphorous fertilizer or pellets of poultry manure. Lime acidic soils only if the pH is below 5.5 GV
- Tomatoes are heavy feeders GGC
- Tomatoes receiving standard nutrition (100%) were compared with enhanced nutrition (150%): enhanced nutrition was found to have a significant positive effect on tomato quality, color, and acceptability Better Crops
- Boron
- boron deficiencies in tomato production are fairly widespread and often go unrecognized
- boron fertilization improves tomato yield and fruit quality by decreasing the number of fruits with uneven ripening and preventing cracking
- boron works with potassium to keep enough potassium movement in to the tomato plant tissue during the later part of the growing season
- research in North Carolina shows that weekly applications of boron (foliar or via irrigation) improve fruit quality
- Calcium (Ca)
- need appropriate amount of water and accessible calcium to prevent blossom-end rot
- use gypsum or bone meal if Ca is needed BG
- Magnesium (Mg)
- tomatoes like lots of Mg; Lime is good if you need magnesium, but only if your soil pH is too low BBGS
- Nitrogen (N)
- Tomatoes don’t need as much N as they do P & K BG
- Phosphorous (P)
- tomatoes need lots of P, but not as much N BG
- Potassium (K)
- essential to production of quality tomatoes
- functions to move water into the cell of the developing tomato fruit
- juicy tomato = adequate potassium available
- tomatoes need lots of K, but not as much N BG
- of all of the essential elements, soil K content most affects the total acid content in the fruit (flavor) Better Crops
- carotenoids & lycopene content in the fruit increases with increased potassium availability Better Crops
- Sodium
- there are several studies that show the addition of sodium (table salt or sea salt was used) clearly improves the flavor, but may decrease the yield
- Sulfur
- especially important to production of quality tomatoes
- forms organic compounds in the plant that gives flavor to vegetables
Tomato Propagation
Methods of propagation
Growing Tomatoes from Seed
Timing: When to Start Tomato Seeds
Indoors:
- 6-8 weeks before last frost (last frost ~4/15, so that’s 2/18-3/4 in Redding, CA) REOG, BG
- seed vendor recommendations range from 4-6 weeks to 6-8 weeks.
- Amy Goldman, who gardens in upstate NY, suggests that you can cut the general 6-8 weeks back to about 4-5 weeks with heated seed-starting mats; aim for 90°F for the soil mix
- gel-sowing is an alternative method of starting seeds that is supposed to be good for tomatoes, and takes 2-3 weeks less time than standard seed-starting REOG
- if you will be growing tomatoes in a heated greenhouse, start seeds in January REOG
- sow seeds in spring, transplant in spring & summer, harvest in summer & fall
Outdoors:
- outdoor sowing is not generally recommended
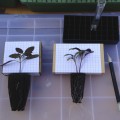
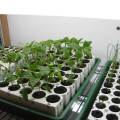
- because tomatoes have a long growing season, it’s helpful to start the seeds indoors so that when it’s warm enough outside, the starts are ready. Starts from seeds sown indoors also tend to be healthier, stronger, and more resistant to diseases. GV
- sowing is best done undercover, either indoors, in a green house, or inside a cold frame.
Growing Media: Pick a Growing Medium for Starting your Seeds:
- Growing Medium must be sterile
- Types of growing mediums::
- Seed starting sponges are my favorite. just plunk them in a tray with cells, or better yet, a Styrofoam planting block then plunk your seed in the pre-drilled hole. they soak up moisture at just the right rate and have nutrients for the seedling. with the floating planting block, you don’t have to water from above, which can damage the seedling. Also, there’s less occurrence of stem rot. Also, no fungus gnat larvae to deal with. Park Seeds is where I buy them.
- Soil-less Growing Medium: usually consists of some combination of peat moss, bark, coir, perlite, and/or vermiculite. It’s preferred over soil due to sterility and good drainage and better air space.
- Gel Sowing: I’ve never done this, but it sounds like a fantastic way to do it, although you basically need a laboratory…sterile, great moisture & food control. Also takes up less space & quicker. See gel-sowing instructions.
- Bubbling Water: this method is known as “Imbibing”. seeds are enclosed in cheese cloth, then dangled in an aquarium or other water bath with air bubbled through the water. Very quick method, but you have to untangle the germinated seeds without hurting the roots, then pot them up. Haven’t tried it myself.
- Homemade potting mix for starting eggplants & tomatoes REOG:
- 1-2 parts (2-4 gals) worm compost
- 1 part (2 gals) sharp sand or horicultural sand
- 3 parts (6 gals) well-rotted leaf mold (or other peat alternative)
- plus 2.5 oz ground limestone
- (note that this homemade blend won’t be sterile)
Containers for Starting Tomato Seeds
- flats filled with medium: seedlings should be pricked out and potted up when first true leaves emerge.
- trays with cells or cell packs: depending on the size of the cell, they will need to be potted up once the first true leaves emerge
- 3 1/2″ pots: no potting up necessary
- great to start in tub-shaped biodegradable pots that can be planted directly into the soil. Over time the pot rots away naturally.
- Styrofoam blocks that float (see Seed Starting Sponges, above)
Lighting
- Tomatoes can be started in a sunny window sill, but I can never find a window sill big enough! 16 hours of light is required when starting seeds indoors. This is because indoor lights have less intensity than the sun.
- light source should be 6-12″ above plants, and must be moved as the plants grow taller. If the lights are too high, then the plants get straggly.
- on for 12-16 hours per day
- Normal fluorescent lights work until the plants are older, then they need additional wavelengths of light
- When seedlings appear, move the trays or modules somewhere with bright light and a constant temperature of 70-81 degrees F.
Temperature: Germination Temperature Recommendations
- Air temp should be at least 60°F, but i think they like it better in the mid-70s. over 80 is too hot.
- Soil temperature needs to be 70-90 degrees for all nightshades.
- gentle heat from under is best. heating mats are sold just for the purpose of seed starting
- Tomato seeds are unlikely to germinate at temperatures lower than 59°F, so you may want to put them in a heated propagator.
- 70-80°F soil G101
- at least 60°F REOG
- 80 degrees TKG
Water
- water very carefully: a light sprinkle so you don’t float the seeds.
- water from the bottom, if possible
- Seed starting sponges with their styrofoam planting blocks float in a tray of water and soak up moisture at just the right rate and also contain nutrients for the seedling. with the floating planting block, you don’t have to water from above, which can damage the seedling. Also, there’s less occurrence of stem rot. Also, no fungus gnat larvae to deal with. They can be purchased from Park Seeds
Humidity and Air Circulation
- humidity should be high, but the higher the humidity, the better the air circulation needs to be. I use domes to cover the seed trays to keep it humid, with the vents open, to get some circulation. As soon as some of the leaves are touching the dome, i remove it. If I don’t remove it at this point, the leaves touching the dome rot.
Seed Depth
- If using the seed starting sponges, just drop the seed down the hole; don’t worry that it’s going too deep.
- Plant tomato seeds 1/4″ deep (G101)
Germination: Time to Germinate
- 7-14 days (G101)
- 6-10 days (TKG)
- 6-14 days (BG)
- if bubbling or imbibing: 3 days (TKG)
Growing Tomatoes from Purchased Starts or Seedlings
- Seedlings can withstand cooler soil temperatures (REOG)
- water tomato seedlings sparingly; kept on the dry side, roots will develop but plant will stay short. this gets the plant off to a better start when planted out.
- Transplant after about 8-weeks in late spring or early summer, depending on weather. (GV)
- If you are planting starts from the nursery, don’t put them out until night time temperatures are staying above 50 degrees Fahrenheit, which turns out to be about 2 weeks after your area’s last frost.
Division
not possible because of root system
Growing Tomatoes by Cuttings
- tomatoes readily grow roots, as shown when a vine lays on the ground for too long – it will start growing roots and root down
- side shoots are easily rooted by cutting from plant when 6″ long.
- insert into 3″ pots filled with eqyal parts leaf mold & sharp sand.
- cover with plastic bag or bottle (bell).
- provide bottom heat at 60-62 degrees F early in season
- cuttings root in 10-14 days
- pot up or plant out.
- remove the firs truss of flowers if the plant isn’t growing strongly
Transplanting or Potting Up
- Transplant seedlings about 8-weeks after starting in late spring or early summer, depending on weather. (GV)
- cuttings root in 10-14 days and can be planted out or transplanted then
- seedlings that were started in flats should be pricked out and potted up when first true leaves emerge.
- if started in trays with small cells or cell packs: depending on the size of the cell, they will need to be potted up once the first true leaves emerge
- 3 1/2″ pots: no potting up necessary
- bio-sponges: seedlings growing in bio-sponges should be up-potted when the plants start hitting each other – depending on what size bio-sponge, this will be at anywhere from 10 days to 4 weeks
- Transplant 1-2 times to avoid root crowding, before planting in the ground (G101)
- Should be planted outside before they flower, so pinch off flowers if they bloom before getting planted
- Harden off:
- when daytime temperature is above 50 degrees F
- take outside for the day, then bring them back in at night
- When the seedlings have two or three true leaves and are large enough to handle, carefully prick them out into individual 2-3″ pots or biodegradable tubes. Keep them in a warm, bright, well-ventilated place.
Seed Saving
- Tomato seeds are easy to save, keep pure & harvest (REOG)
- crush tomatoes
- let ferment to kill some of the diseases that could be present
- soaking seeds for 25 minutes at 122 degrees F eliminates target spot & bacterial canker
- wash & dry well
- Very high success rate; collect seeds only when the fruit is very ripe. Cut it in half, pry out the seeds, leave to dry on paper towels. Don’t attempt to save seeds from F1 hybrids; they are unlikely to inherit the same qualities of the plant you harvested them from. Even non-hybrids may cross-pollinate. If you want to be sure to get non-cross-pollinated seeds, grow the plants well away from other cultivars. (GV)
Planting Out Tomatoes
Timing
- Tomatoes that are planted too early, when it’s too cold out for them, are said to be less productive.
- wait to plant out your tomatoes until night time temperatures to stay above 50°F for best production (most resources say 45-55°F)
- tomatoes should be ready to plant out when the first flowers start forming (pluck these flowers off)
- if it’s still cold out, and they are starting to get root-bound and scraggly, plant them out, but provide frost protection (even if it’s not freezing) to keep them at 50°F over night. Wall-of-water, frost cloth, fleece, cloches, etc, will do the trick
- Set outdoors 1-week after last frost date (4/22 here in Redding, CA) (G101)
- Should be planted outside before they flower. pinch off flowers if they bloom before getting planted
- If you are planting starts from the nursery, don’t put them out until night time temperatures are staying above 50 degrees Fahrenheit, which turns out to be about 2 weeks after your area’s last frost.
- Harden off before planting out:
- when daytime temperature is above 50 degrees F
- take outside for the day, then bring them back in at night
Bed Prep & Soil Amendments
- tomatoes do well following a cover crop of winter rye – green manure (REOG)
- Recommended soil amendments (REOG):
- option 1: medium-fertility soil improver
- option 2: low-fertility soil improver + general organic fertilizer
- Work fertilizer into soil before planting (NCG)
- Not particularly fussy about the soil, as long as it’s rich & fertile. Dig in well-rotted compost or manure to a depth of at least 12″ before planting or apply general high-phosphorous fertilizer or pellets of poultry manure. Lime acidic soils only if the pH is below 5.5. (GV)
Planting Depth
- plant vine (indeterminate) tomatoes quite deeply; I plant them so that only the tip plus 2 or 3 leaflets are above ground. Pinch off leaflet branches that are below ground.
- plant leggy seedlings especially deep
- be very careful to not bruise or break the stem when planting – this can allow infection which will kill the plant
Spacing
- Standard Spacing:
- Indeterminate tomatoes should be spaced 15-18″ apart in staggered double rows 36″+ apart
- Bush (determinate) tomatoes need more room: 24″
- Dwarf or container varieties can be as close as 12″
- Biointensive Spacing:
- Cherry tomatoes: 18″ apart in all directions, planted in an off-center grid (53 plants per 100 sq ft)
- Regular size slicing tomatoes: 21″ apart in all directions, planted in an off-center grid (35 plants per 100 sq ft)
- Large tomatoes: 24″ apart in all directions, planted in an off-center grid (26 plants per 100 sq ft)
- Amy Goldman, author of “The Heirloom Tomato” recommends wide-spaced planting of tomatoes in a field, 5 feet apart in rows 7 feet apart; she says this is the key to primary prevention of infectious diseases
Growing Tomatoes in Containers
- tomatoes can be successfully grown in bags or large containers
- place them in a warm spot, ideally protected by a sunny, south-facing wall
- Tomatoes do well in containers because their roots are fairly shallow (GV)
- trailing bush tomato varieties are exceptionally pretty – a number of bush tomato varieties have small, cherry-sized fruits and the plants are natural trailers. They are ideal contenders for hanging baskets, although they are notoriously hungry & thirsty.
- Line the basket with mock moss: made from wool, coir, or other recycled materials (as traditional sphagnum moss is no longer considered to be eco-friendly) in order to retain soil or potting mix, and water and fertilize regularly. This may mean watering twice a day in hot weather. If you let the basket dry out completely, it’s hard to get it to hold water again. Tomatoes are also well-suited for windowboxes.(GV)
- Tumbling Tom Cherry Tomatoes, available in red and yellow, are a great variety for hanging baskets because of their compact, trailing growth habit.
- Bush cultivars can even be grown in hanging baskets. (REOG)
Routine Cultivation & Maintenance for Tomatoes
Water Requirements
- Irregular watering & heat leads to problems:
- growth cracks on tomatoes
- blossom end rot
- sunscald
- powdery mildew
- Overwatering leads to problems:
- root rot
- locks up magnesium in the soil, which causes yellowing of lower leaves between veins (veins remain green)
- Critical period for water is just after blossoming when fruit begins to form
- After the initial mudding-in, only water tomatoes when they wilt (BBGS)
- From REOG:
- watering, in general, encourages vegetative growth, which is helpful for leafy crops, but can delay production of tomatoes and may reduce flavor
- regular watering is important in early stages, as seedlings & young plants mature
- Critical period for water is when tomatoes are fruiting
- Container tomatoes need regular water (sometimes 2x) and supplemental feeding with high potash
- overwatering or over-feeding reduces flavor
- From NCG:
- water regularly and consistently
- don’t let soil dry out (which causes leaf curl & blossom-end rot)
- withholding water makes more intense flavor but stresses out the plant, making it more susceptible to disease
- From GGC:
- generous watering is probably more important for tomatoes than any other crop because it prevents several problems
- transplants should get watered daily (less than 2″ dry layer)
- once they are settled in, they should get 1.5″ water per week
- From TKG:
- water is the most critical element to growing tomatoes
- too much water = watery fruit
- too dry = disfigured fruit
- keep them evenly moist from 1st blossom to harvest
- in heat-intensive climates, plant tomatoes between patches of taller crops like corn
- water stress: creates smaller, sweeter, faster fruits (more fruit, faster, concentrates sugars)
- try it at the end of the season in the last few weeks prior to frost
- critical water phase: from pollination to enlargement of fruit
- From TNG:
- be consistent! (avoids blossom end rot)
- keep soil moist
- From AHSEG:
- all types of tomatoes should be watered and mulched heavily once the soil is warm
- in dry conditions, water weekly at a rate of 2 gals per plant
- plants in containers need more frequent watering
- take care not to overwater
- From MGH:
- Keep soil around new transplants moist for the first 3-4 weeks
- water established plants when the soil dries down 2-3″
- apply enough water to wet the root zone thoroughly (1-2′ deep)
- since root depth & weather vary, the right interval for applying water can vary from 1-3 times per week to once every 10-14 days
- plants are best irrigated by using soaker hoses, drip irrigation, or another means that applies water slowly without wetting foliage
- From UCANR:
- Calculating water needs using evapotranspiration (ETo):
- ETo*Kc = tomatoET
- where ETo can be looked up online for your area (or MGH table 4.2 – Redding is in zone 2)
- Kc = crop coefficient for tomatoes
- tomatoET = water loss for tomatoes per the ETo for that day
- According to “Crop Coefficients for Drip-irrigated Processing Tomato” by Hanson & May (4/2005), a canopy coverage of 90% resulted in a crop coefficient of 1.08 in the San Joaquin Valley (for what month?)
- For Redding, According to CIMIS (California Irrigation Management Information System):
- May’s ETo: 6.62, and the Kc for just planted tomatoes is 0.26, so the tomatoET = 1.72 (inches)
- June: ETo = 7.91, Kc = 1.14 (75% soil coverage by leaf canopy), so tomatoET = 9.02
- July: ETo = 8.73, Kc = 1.14, so tomatoET = 9.95
- August: ETo = 7.40, Kc = 1.14, so tomatoET = 8.44
- Calculating water needs using evapotranspiration (ETo):
- From ATTRA:
- Water must be supplied uniformly from the time of first fruit set to harvest
- Uneven moisture periods will give rise to disorders such as blossom end rot and fruit cracking
- Generally, drip irrigation enhances yield and promotes efficient irrigation methods even in situations with challenging slopes and soil properties
- Drip irrigation maintains productivity by keeping the root zone relatively salt-free and limits excess water runoff
- using weather-based reference evapotranspiration (ET) data and crop growth stages, proper drip irrigation requirements should be determined by the site-location requirements. ET is a calculation of the water lost from soil and plants and is measured in inches.The effects of ET are increased by solar radiation, wind, low relative humidity and high temperatures. The number of inches measured is the amount of irrigation water that needs to be delivered to the root zone of the plant. To find state-based ET data, see the National Weather Service’s Evaporation Data.
- Generally, tomatoes require one inch of water from rain or irrigation once a week for optimal growth
- Tomatoes have a deep root system and therefore thrive on deep, infrequent irrigation methods
- Watering less frequently decreases the susceptibility to root-rot diseases and increases efficient weed management
Fertilization Recommendations
- When tomatoes are as big as plums, fertilize every 4 weeks (NCG)
Mulching & Weeding
Pruning
Shading
if it’s hot in your area, shading is necessary to prevent tomatoes from getting sunscald. This happens when the fruit gets warmed to 100°F. Shade provided by good leaf cover is good enough: just make sure that tomatoes in the “mature green” stage (at about 80% of their final size) and “breaker” stage (starting to change color at the blossom end) have good leaf cover
Support
- 2009 Season: This year I tried trellising the tomatoes. I erected concrete mesh down the center of the bed and grew one tomato on each side, all the way down it – as it turned out, it was very high maintenance, since i had to tie up the vines (all indeterminate varieties). There also wasn’t enough natural shade for the tomatoes, so all of the first tomatoes were sun burned.
- in 2010 I improved upon the single trellis by putting up a second sheet of concrete mesh to sandwich in the tomatoes. There should be little or no need to tie up the vines, and they will give each other more natural shade!
- 2010 UPDATE: The Sandwich Trellis Method is a hit!
Tomato Support System: The Sandwich Trellis
- planted my tomatoes plants in double rows, with 18″ between plants and 24″ between rows. Then I erected sheets of concrete mesh on the outer edges of each double row of tomatoes, right at the point the tomato plant was coming out of the soil, so the trellises were about 18″ apart. I put down stepping stones in-between the rows for my pathways.
- It has been a huge improvement over the past years’ bed designs. There is lots of shade for the ripening tomatoes, there is very little moisture loss, and the plants have all of the support they need. It’s also very easy to reach in through the trellis for pruning and harvesting.

Pollination
- Bees do most of the pollinating for tomatoes (GGC)
- Open pollination makes uneven results (GGC)
- shake the plants periodically to encourage pollination
Winterizing
Pests, Diseases & Problems
Common Pests
Common Diseases
Symptoms
Please see article: Pests, Diseases & Problems of Tomatoes by Symptom
Companion Planting
Helpful Companions
Harmful Companions
- Beets: can encourage the spread of Curly Top Virus to tomatoes
Companion to..
Harvesting & Storage of Tomatoes
Edible Parts of the Plant
Just the fruit!
Just the fruit is edible on tomatoes, but they can be eaten at any stage of ripeness. Green tomatoes will ripen in storage, too, but they taste best when left on the vine till ripe & ready.
All other parts of the plant are poisonous, as with all of the nightshades.
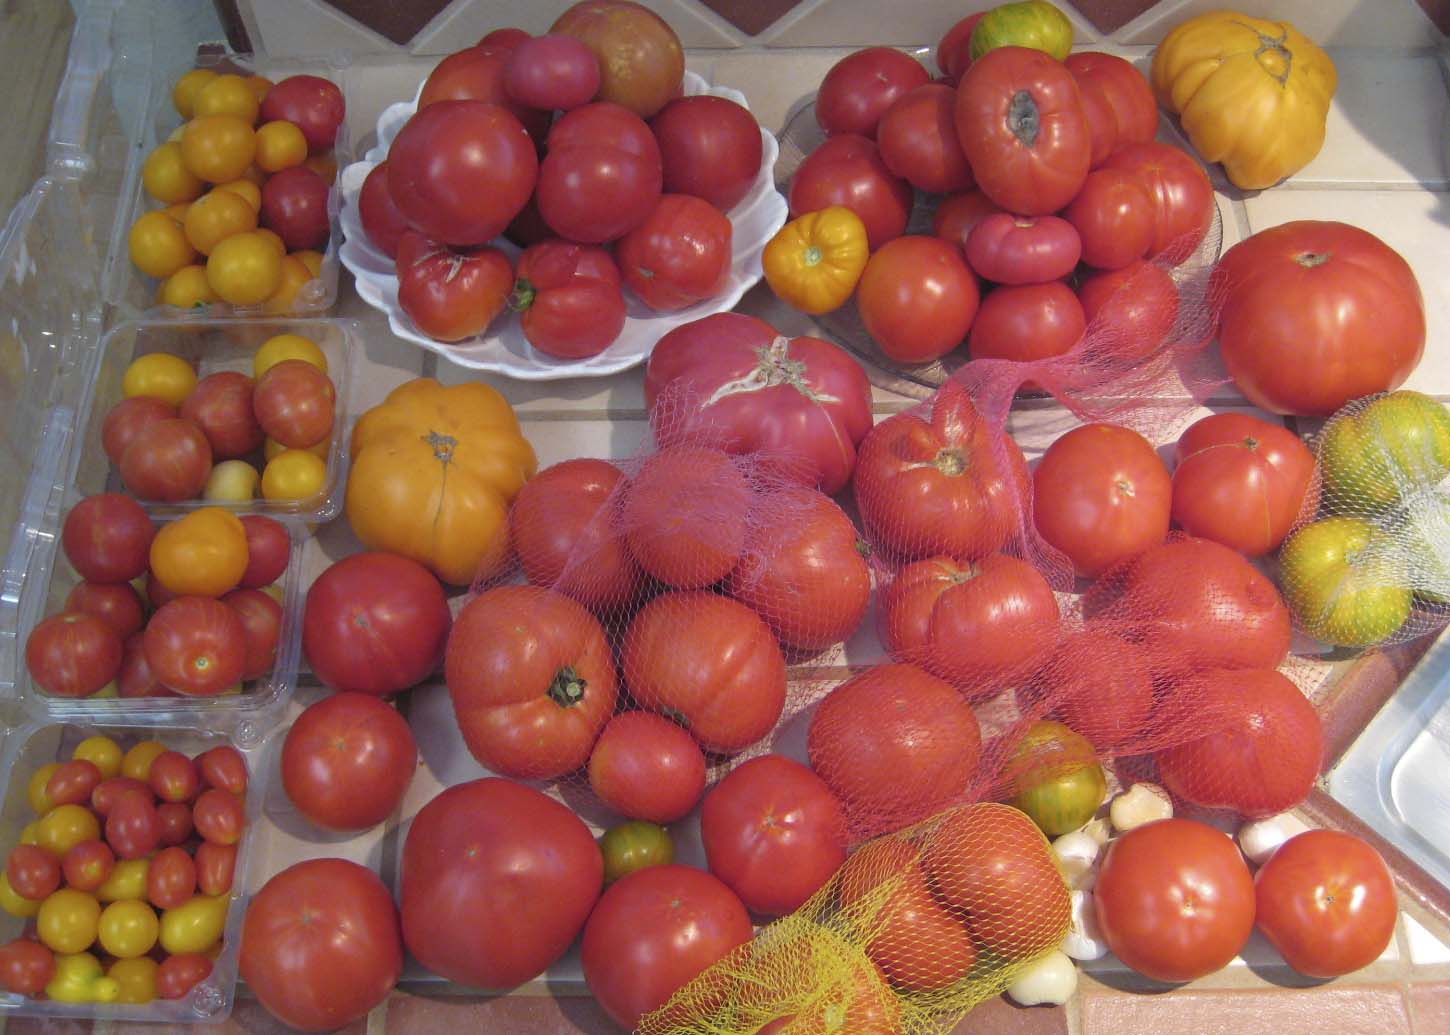
Yield
- according to “How to Grow More Vegetables”, you will want to grow 90 pounds of tomatoes per person to provide 70 pounds of canned tomatoes and 20 pounds of fresh tomatoes for consumption throughout the year
- USDA data says 67 pounds can be grown in 100 square feet, by conventional methods
- if grown according to the biointensive method, at least 100 pounds can be grown in 100 square feet – even by a beginner. Intermediate skill levels can expect 194 pounds, while advanced gardeners can expect 418 pounds from the same 100 square feet
Days to Harvest / Harvest Timing
- Early cultivars are ready in as little as 50-55 days, but in general they run from 75-85 days, with a few way out there at 90-100 days
- Ripe is considered to be when at least 90% of the tomato surface has turned from green to its tell-tale color; fruit will also soften a bit, and have its characteristic smell
- black tomatoes, beefsteaks and other soft tomato varieties benefit from early picking at the “pink stage” (60% of the surface is colored) to the “light red stage” (up to 90% colored); allow these ones to complete their ripening at room temperature
- Seed to harvest takes 7-12 weeks (REOG)
- Ripe tomatoes are pretty easy to spot as they will be full-looking and appealing to the eye; for a red variety, you’ll want the tomato to become a bright red; however, rely on the variety’s description of color VG
- You can cup the bottom of the tomato with your hand, twist a bit and lift: if the tomato comes off the plant rather easily it’s ready to eat VG
Harvest Methods
- Tomatoes are ready to harvest when they start smelling like a tomato. The color should be uniform, which will probably be 7-10 days after it first starts to color.
- Pick them by twisting the fruit gently sideways at the knuckle of the stem.
- Green Tomatoes: about 6 weeks before the first frost date, stop watering (or slack off considerably). this will force these green tomatoes to ripen.
Storage of harvest
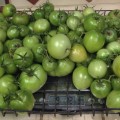
Green or Unripe Tomatoes
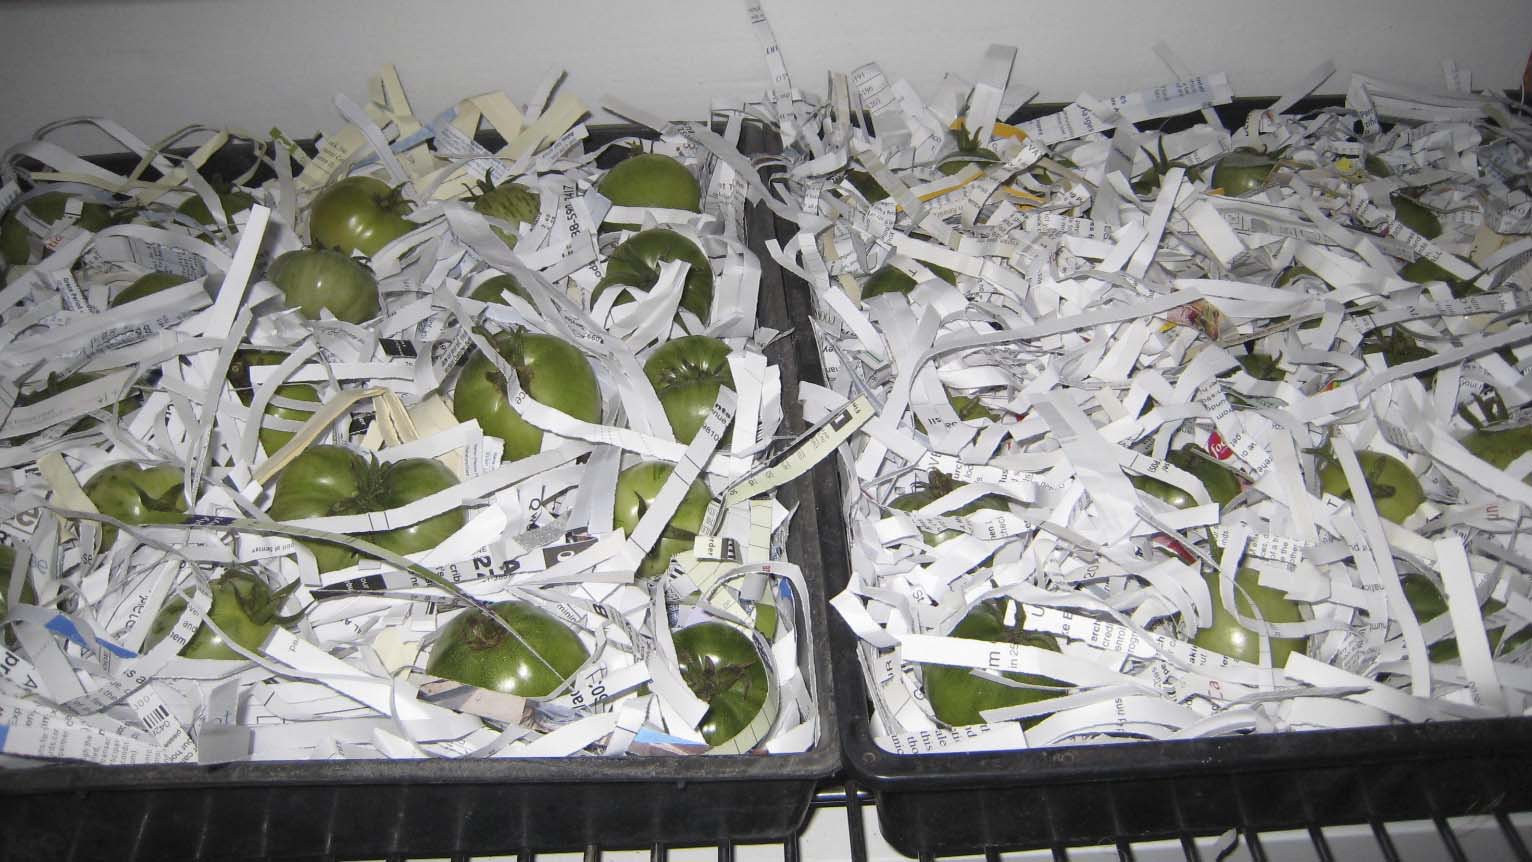
Green tomatoes stored for winter ripening
- Unripe, green tomatoes can be stored individually wrapped, or left on the plant.
- For individually wrapping, pick all of your tomatoes, even the green tomatoes, right before the first frost. Don’t wash them; just wipe off any dirt. Pick out any tomatoes with splits or other blemishes; these should be eaten, not stored. Wrap them individually with paper. Newspaper, tissue paper, brown paper bags, or shredded paper will work. The point is to keep them from touching each other. Lay them in a single layer in a drawer, or crate, or tray, in a cool, dark place, like a root cellar. Check at least once per week for ripe ones and to make sure things aren’t starting to rot or getting eaten.
- You can also cut down the entire plant at the dirt and hang them upside down or lay them in dry straw
Fresh
- Fresh, ripe tomatoes should never be refrigerated. It reduces their flavor and changes the texture
- If they are in danger of rotting before you can eat them, you can put them into the fridge, though, to try to stop the rotting process. I also put a sliced tomato in the fridge, if I can’t finish it
- The perfect way to store them is just right on the counter, with the stem-side down. Eat them before they go soft.
Canned
Time and energy intensive (not to mention HOT work in the warmest days of summer), but results in the best texture and longest lasting. Also requires special equipment.
Tools & Equipment Needed:
- Hot water bath canner
- Canning jars
- Canning equipment (jar lifter, lids, rack, funnel, ladle)
Methods:
Tomatoes need to be peeled by blanching after washing, coring, and trimming. To learn how to can, pick up a copy of the age-old standard Ball Blue Book guide to canning at any hardware store, or any store that sells canning supplies. This is the standard that all refer to. Tomatoes can be canned whole, diced or pureed.
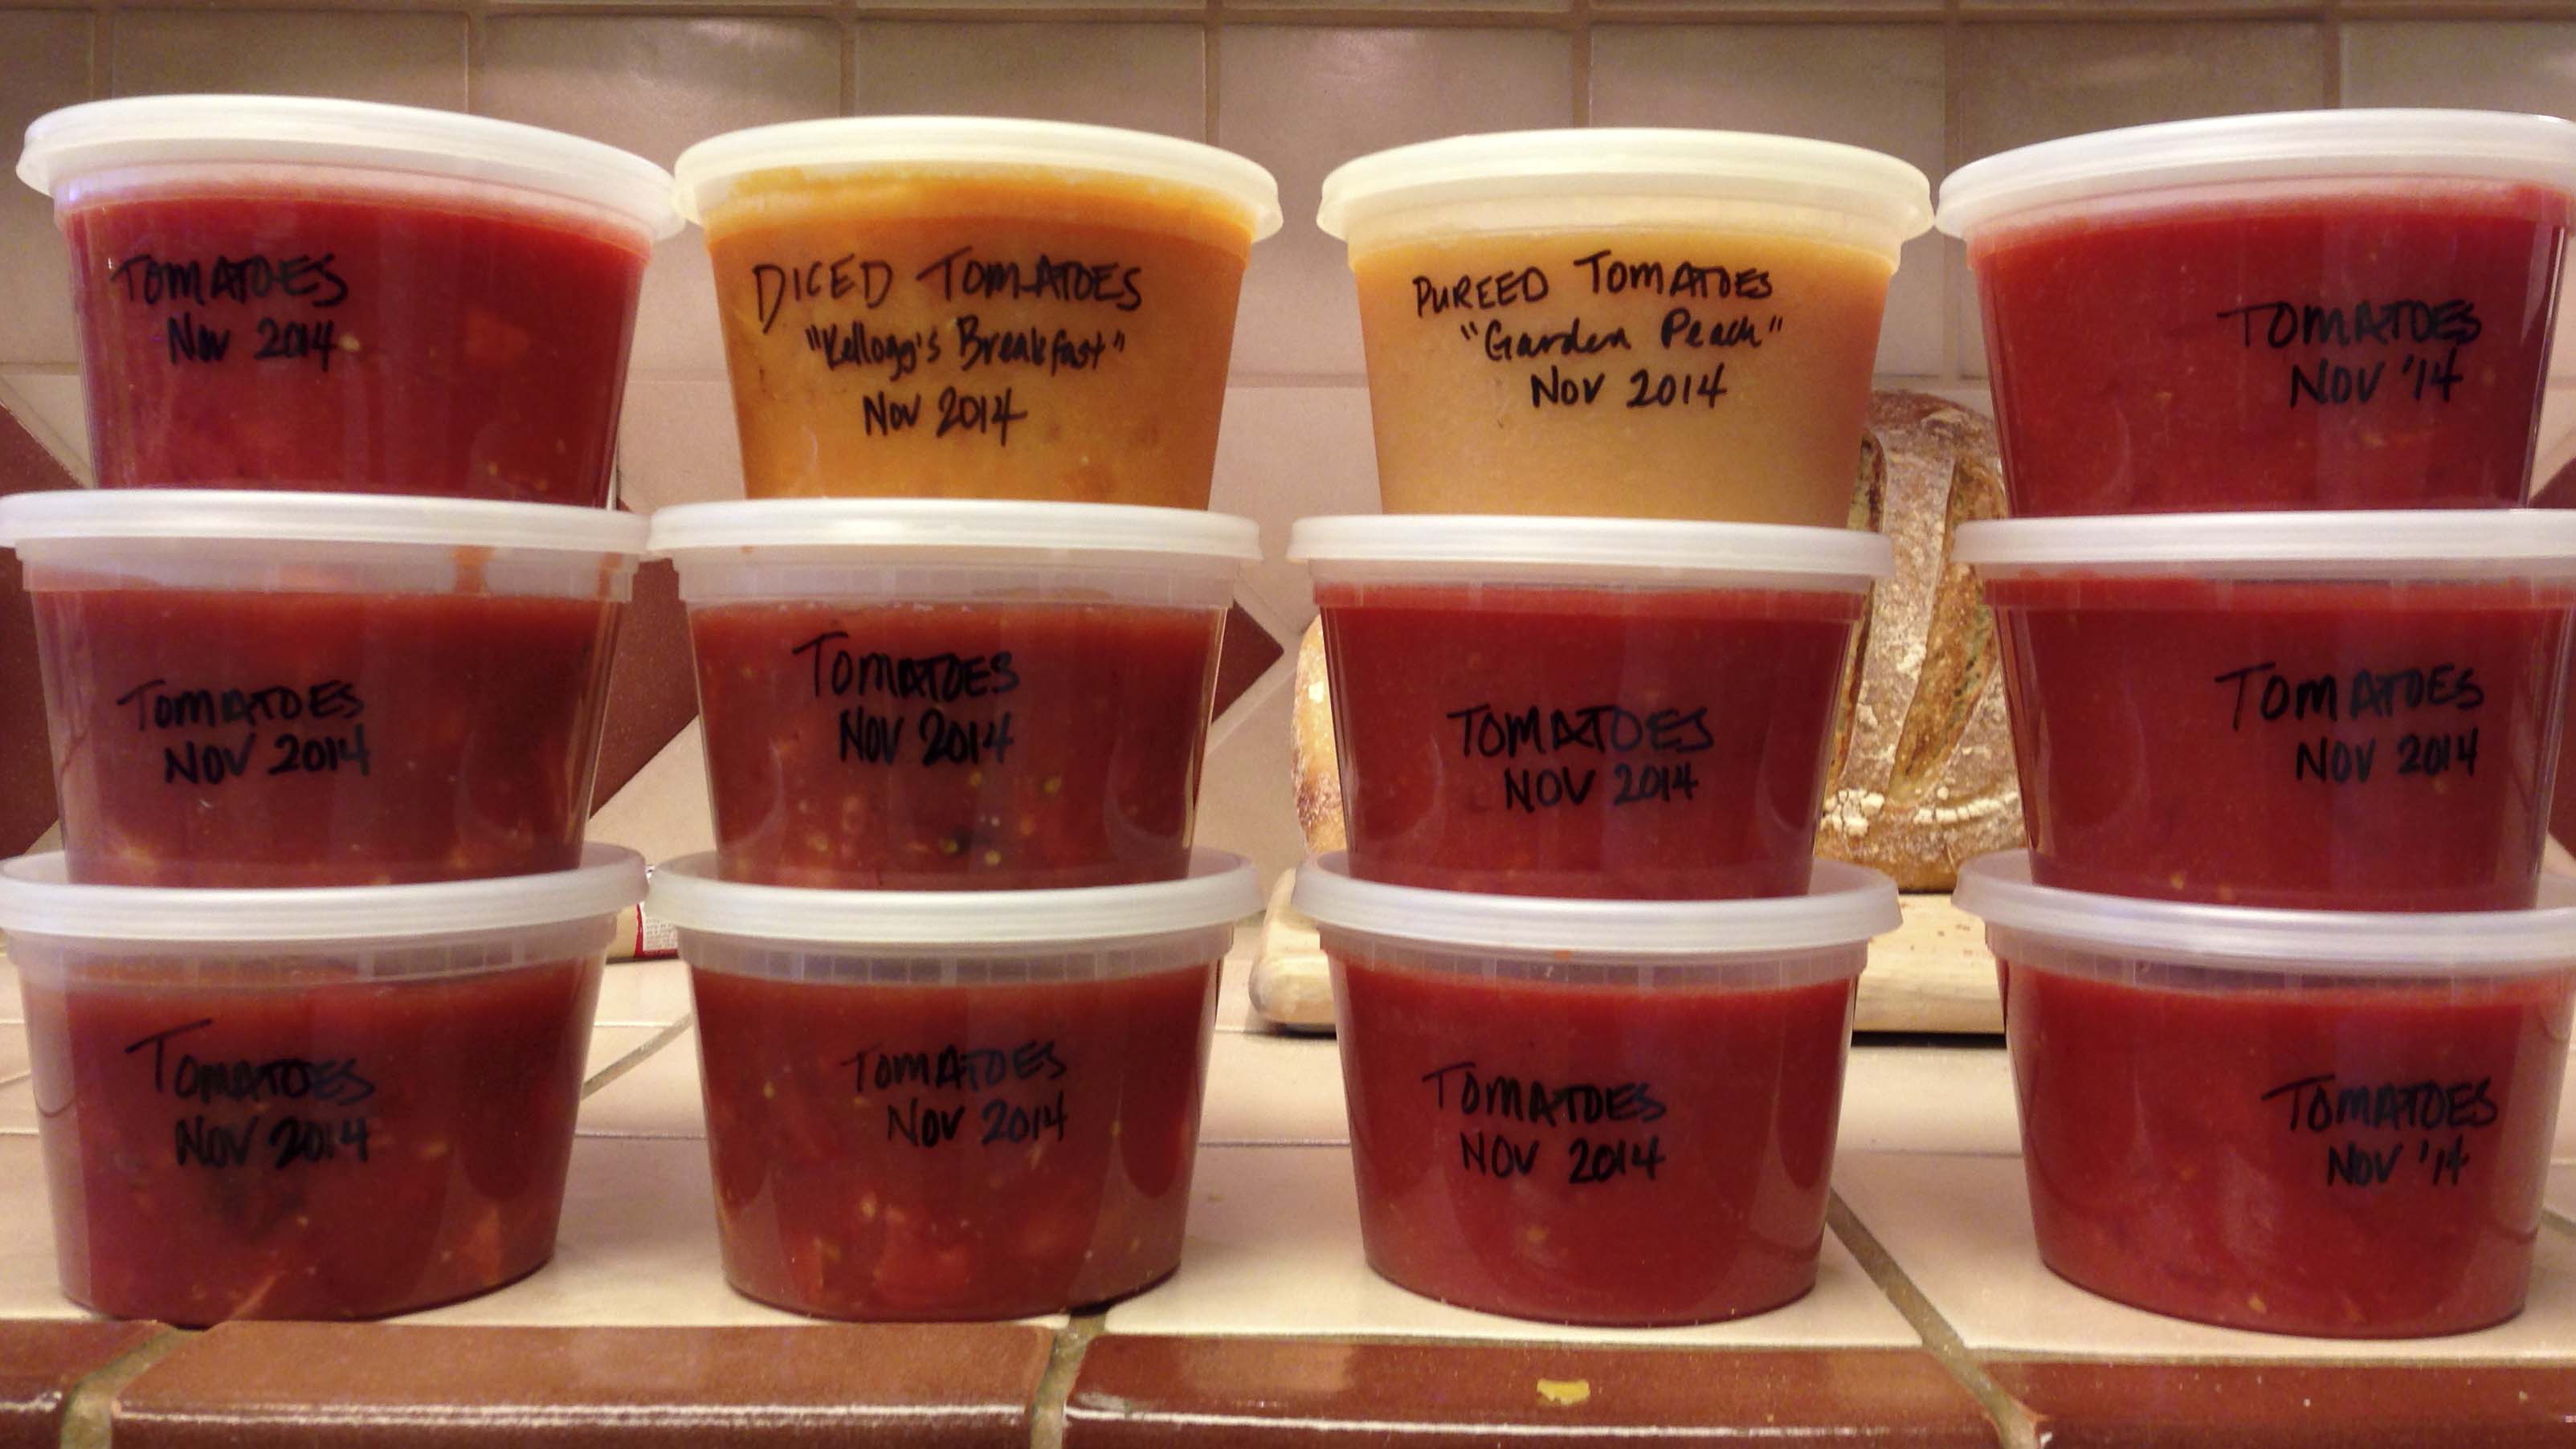
Frozen
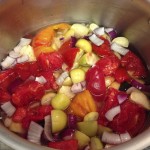
In my opinion, freezing is the easiest method of preserving tomatoes. They definitely need to be cooked or blended, since the freezing turns their flesh mushy, but there’s no need for blanching & peeling.
Tools & Equipment Needed:
- Packaging:
- Vacuum Seal System
- or Ziplocs
- or Canning jars that are okay to freeze
- or plastic containers that are okay to freeze
- Freezer: Frost-free freezers work fine for tomatoes, but it would be great if you had a non-frost-free freezer
Methods:
Whole Tomatoes:
- By far the easiest and most flexible method.
- Can be chopped or crushed or pureed when the time comes to cook with them.
- Wash, core and trim any blemishes, then freeze individually, cored-side-down on a sheet.
- When frozen, package them up in vacuum-seal bags (or ziplocs), about a pound to each bag.
- This is just about the quivalent to a 15-oz can of tomatoes.
- When it’s time to cook with them, the skin slips right off with a gentle tug when they are defrosting.
Diced Tomatoes:
- Wash, core & trim, then dice away
- If using cherry tomatoes, just slice them in half
- I like to do a diced/pureed combo: cut off skin and put into vita-mix (or food processor), then dice the meat of the tomato; after pureeing the skins, mix them back together in the freezer container
- Package up in 1-pound portions for use in recipes that call for a can of diced tomatoes (15 oz wt)
Pureed Tomatoes:
Pureed and diced tomatoes ready for the freezer
- This is one of the few methods that is also great for preserving cherry tomatoes
- Wash, core & trim
- No need to peel
- Puree with a blender or food processor
Cooked Tomatoes
-
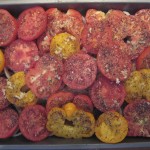
- Roasting tomatoes
-
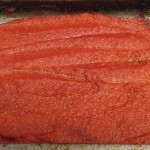
- Tomato paste cooking down
-
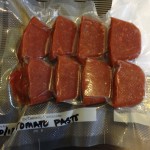
- Tomato paste vacuum sealed
-
- Salsa verde
- Roasted Tomatoes:
- YUM!! these are great defrosted and broiled with cheese on baguettes or served on top of chicken breasts with mozzarella…or sliced and added to pasta. Many options here.
- Tomato Paste
- Tomato Sauce or Marinara or Pizza Sauce
- Chile verde
Dried
-
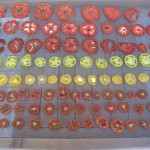
- Drying tomatoes outdoors
-
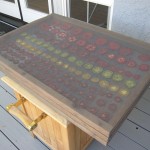
- Screens to keep insects out
This is my second-favorite method of preserving tomatoes. Especially because of the price of store-bought sun-dried tomatoes, and because of how little space they take up when storing.
Tools & Equipment Needed:
- Dehydrator – or if you are like me, and you live where it’s very dry in the summer (we get down to 12%-18% humidity) you just need a screen
- packaging: ziplocs or vacuum sealer
Method:
- Wash, core and trim blemishes
- cut the tomatoes crosswise, making 1/8″-1/4″ slices. Too thick makes them take too long to dry; too thin makes them stick to the screen.
- lay out flat, not touching and cover with cheese cloth or more screen material, if you are doing outside.
- they take about 2-4 days to dry outside here in Redding, CA
- It takes about 2-3 pounds to make 2-3 ounces
Pickled
One final method of preserving tomatoes is the age-old art of pickling. I have pickled cherry tomatoes, to some success, although I think they absorbed way too much vinegar…so I will have to work on that. There are also lots of recipes for pickling green tomatoes – that might be what I try next year with the abundance of green tomatoes I have every November.
Cooking Tomatoes
Nutritional Benefits & Values
Toxicity
Cooking
Preparation
Cooking Methods
Recipes for Tomatoes
Sources
- GV: Grow Vegetables
- How to Grow More Vegetables (Biointensive Gardening)
- Williams-Sonoma: The Art of Preserving
- Fine Cooking in Season
- Put ’em Up
- Canning for a New Generation
- G101: Gardening 101
- TKG: The Kitchen Garden
- REOG: Rodale Illustrated Encyclopedia of Organic Gardening
- NCG: Northern California Gardening
- GGC: Great Garden Companions
- BBGS: Big Book of Gardening Skills
- VG: Vegetable Gardener

I found you. I searched bio intensive tomato spacing. I was going to use either the concrete panels or a cattle panel. Not sure that I still wouldn’t be tying them up but I like the addition of flowers. Can you explain the use of stakes?
Hi Kathleen,
The 5′ stakes in the Sandwich Trellis Method are vertically anchoring the panels of concrete mesh, one on each end – pounded into the ground.
The 20″ stakes go horizontally, spanning the sandwich; they hold the panels apart and don’t allow them to sag outward.
If you are going to interplant with flowers, I’d be conservative – since they seemed to compete with the tomatoes a little too much.
Happy planting!